
There are two main ways to create a Simple Workflow.
1. The first is to select the "Workflow Wizard" button after clicking the "Create Advanced Workflow" button.
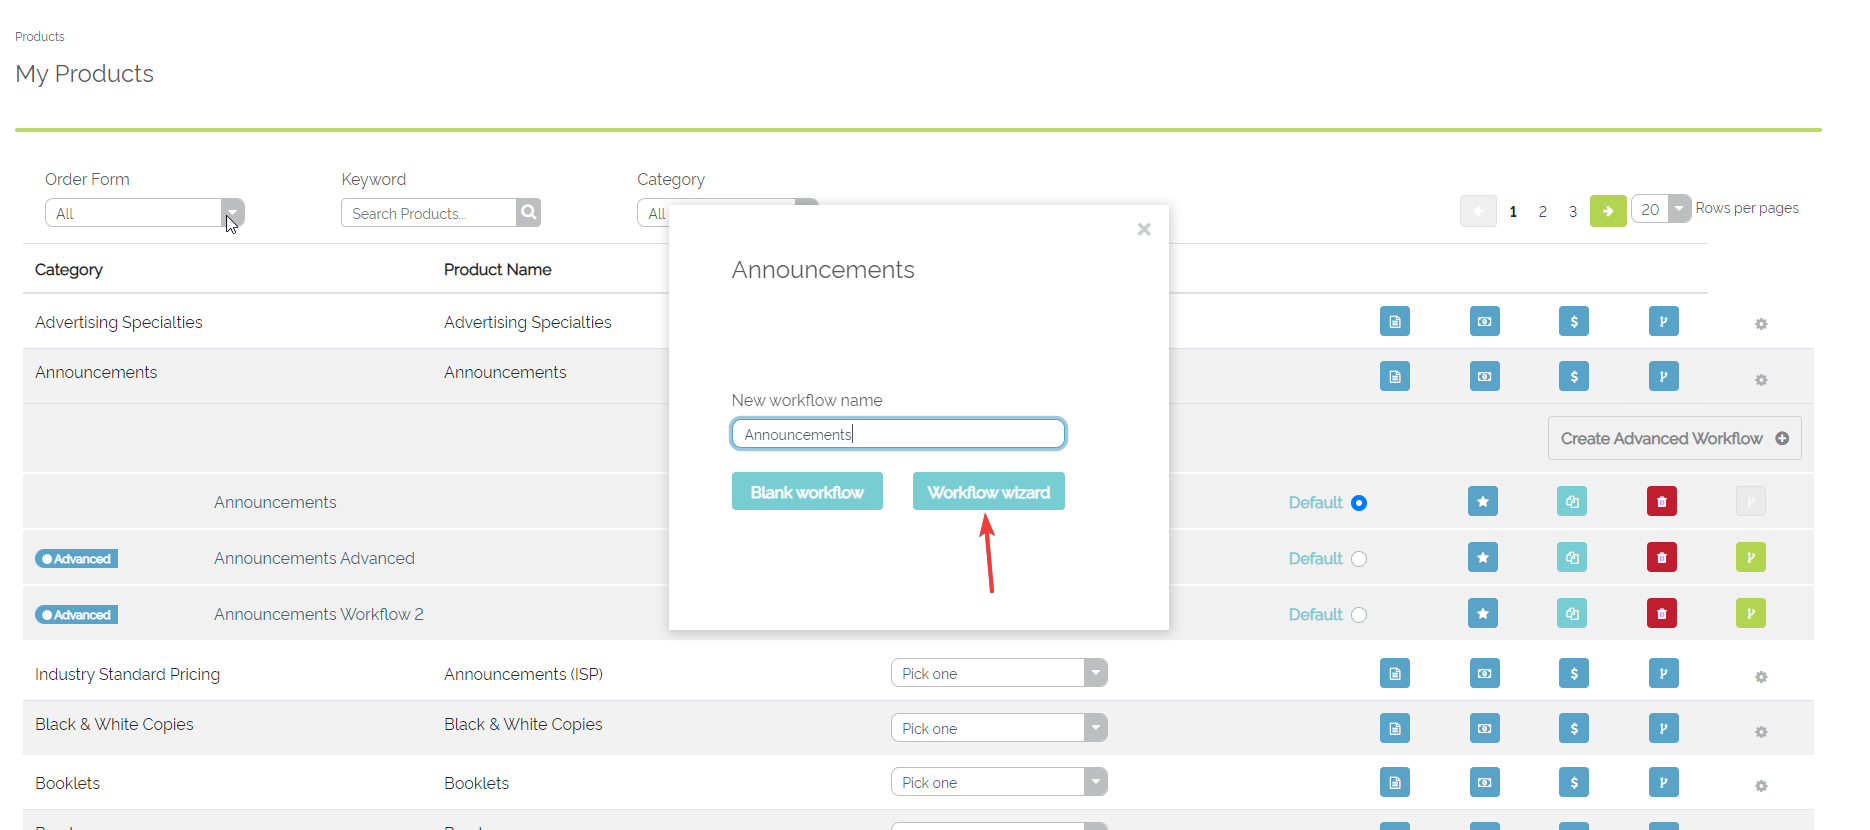
Example of the Create Advanced Workflow Button
2. The second is to select the "Workflow" button next to an already existing Advanced Workflow and click the "Add Workflow Path" link. This will create a new Simple Workflow contained within that Advanced Workflow.

Example of the "Add Workflow Path Link"
Regardless of the way a user decides to start a Simple Workflow, they will be carried over to the Simple Workflow Wizard. The first screen in this Wizard is the "Conditions" page.
Setting Up Conditions
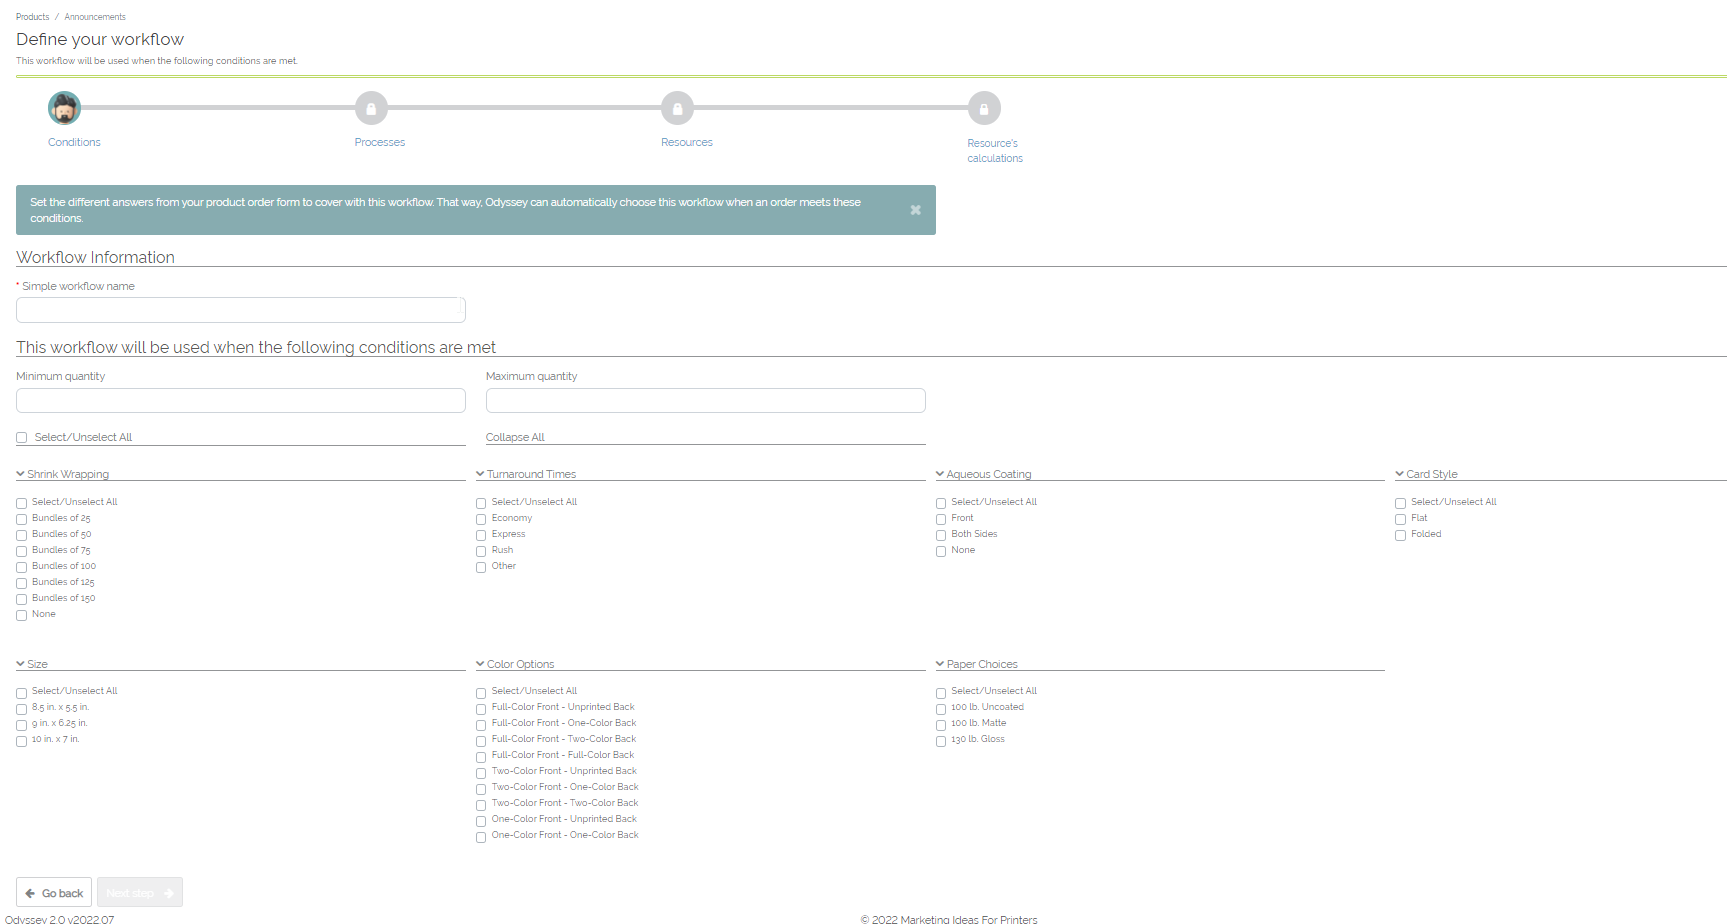
Example of the "Conditions" page
From this Conditions Screen, a user will be able to add the following information:
- The name of the Simple Workflow
- The Maximum and Minimum Quantities for this Workflow
- All of the answers (found on the Product Order Form) that will apply to this workflow. If a user wants all answers from the Product Order form to apply to this workflow, select the "Select All / Unselect All" checkbox.
Once all of the above information has been entered, click on the "Next Step" button to continue on to the "Processes" Screen of the Workflow Wizard. Click here to learn more on setting up Processes.