
The 'Jobs' tab contains seven sub-tabs:
- Unsubmitted
- In Estimating
- Waiting for price approval
- Pending
- In Progress
- Waiting for Payment
- Completed
Jobs that are in the 'Pending' tab are jobs that have not been started as part of Odyssey's scheduling feature.
- Users may select the Job Number's 'i' icon
 to reveal the website's Control Center Order and Job number.
 - Every column within 'Pending Jobs' can be sorted ascending or descending
- Selecting the 'Workflow' tab will allow a user to see which workflow was used when the job was submitted.
- If a printer is not able to open a 'Pending' job workflow, Odyssey presents an informative screen regarding additional information as to 'where' and 'what' needs to be done to the workflow so that it can be opened
- There is also a link to the the printer directly to the product workflow to make necessary changes
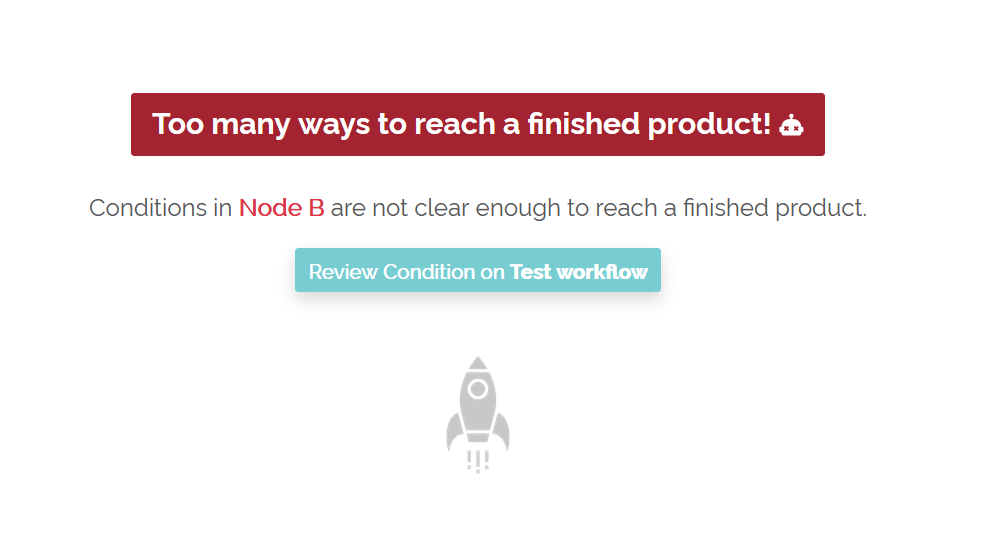
Example of a pending job workflow unable to be opened
- Selecting the top workflow will take a user to the job view of the workflow that was set as the default workflow when the job was placed
- A user may choose a different workflow under 'Other Workflows' if they would like to open the job with a different workflow.
- A pop-up will show that says 'There is a workflow used to show the price in the Website. Using a new workflow may imply changes in cost and price. Continue anyway?'
- Selecting 'Yes' will open the workflow chosen
- Selecting 'No' will not open a workflow for the Pending job
- A pop-up will show that says 'There is a workflow used to show the price in the Website. Using a new workflow may imply changes in cost and price. Continue anyway?'
Job Workflow
- The 'Status' of the job overall will be shown in the upper-right below the 'Due date'
- The selling price (the agreed upon price between the printshop and printbuyer), estimated cost and estimated profit are show in the top-middle section of the job workflow
- The Job Name, Product the order came from, Quantity, and the Cost By Product is shown on the left-hand side under the Job number
Additional details
Additional details such as files sent for the job, chat and more are contained within the 3 blues dot to the right of a job number.
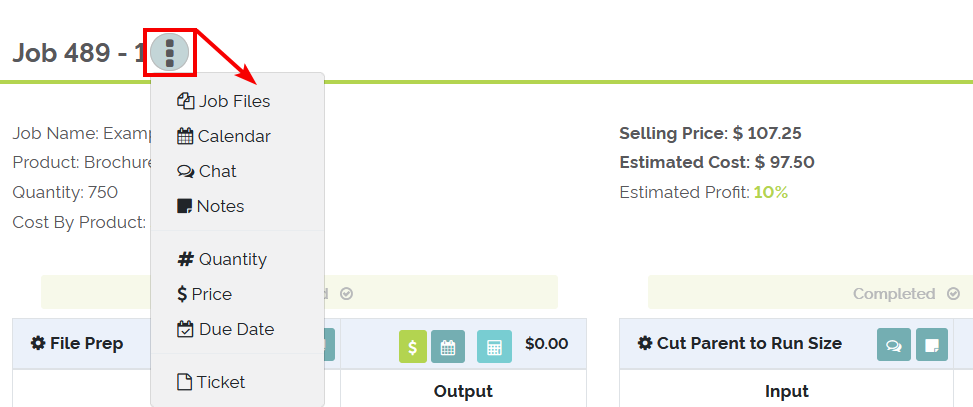
Example of 3 dots next to job number opened up to reveal additional functionality
- Users may access any file associated with the job by selecting 'Job Files
- Users may access the calendar of the job, showing when each process is scheduled to run in production, by selecting 'Calendar'
- Users may access the chat for the job overall to have a chat with the printbuyer or other printshop employees by selecting 'Chat'
- Uses may access the job notes by selecting 'Notes'
- This will allow a user to add a note to the job as well as view any notes for the processes within the job
- Users may adjust the Quantity of the job by selecting '# Quantity'
- Users may adjust the price of the job by selecting '$ Price'
- Users may edit the due date by selecting 'Due date'
Job Ticket
- Selecting the 'Ticket' tab will allow a user to select a job ticket based on the workflow that was used when the job was submitted.
- Selecting the top workflow in the Ticket drop-down will allow a user to open or save the job ticket PDF based on the workflow that was used when the job was submitted.
- A user may choose a different workflow under 'Other Workflows' if they would like to open or save the job ticket with a different workflow.
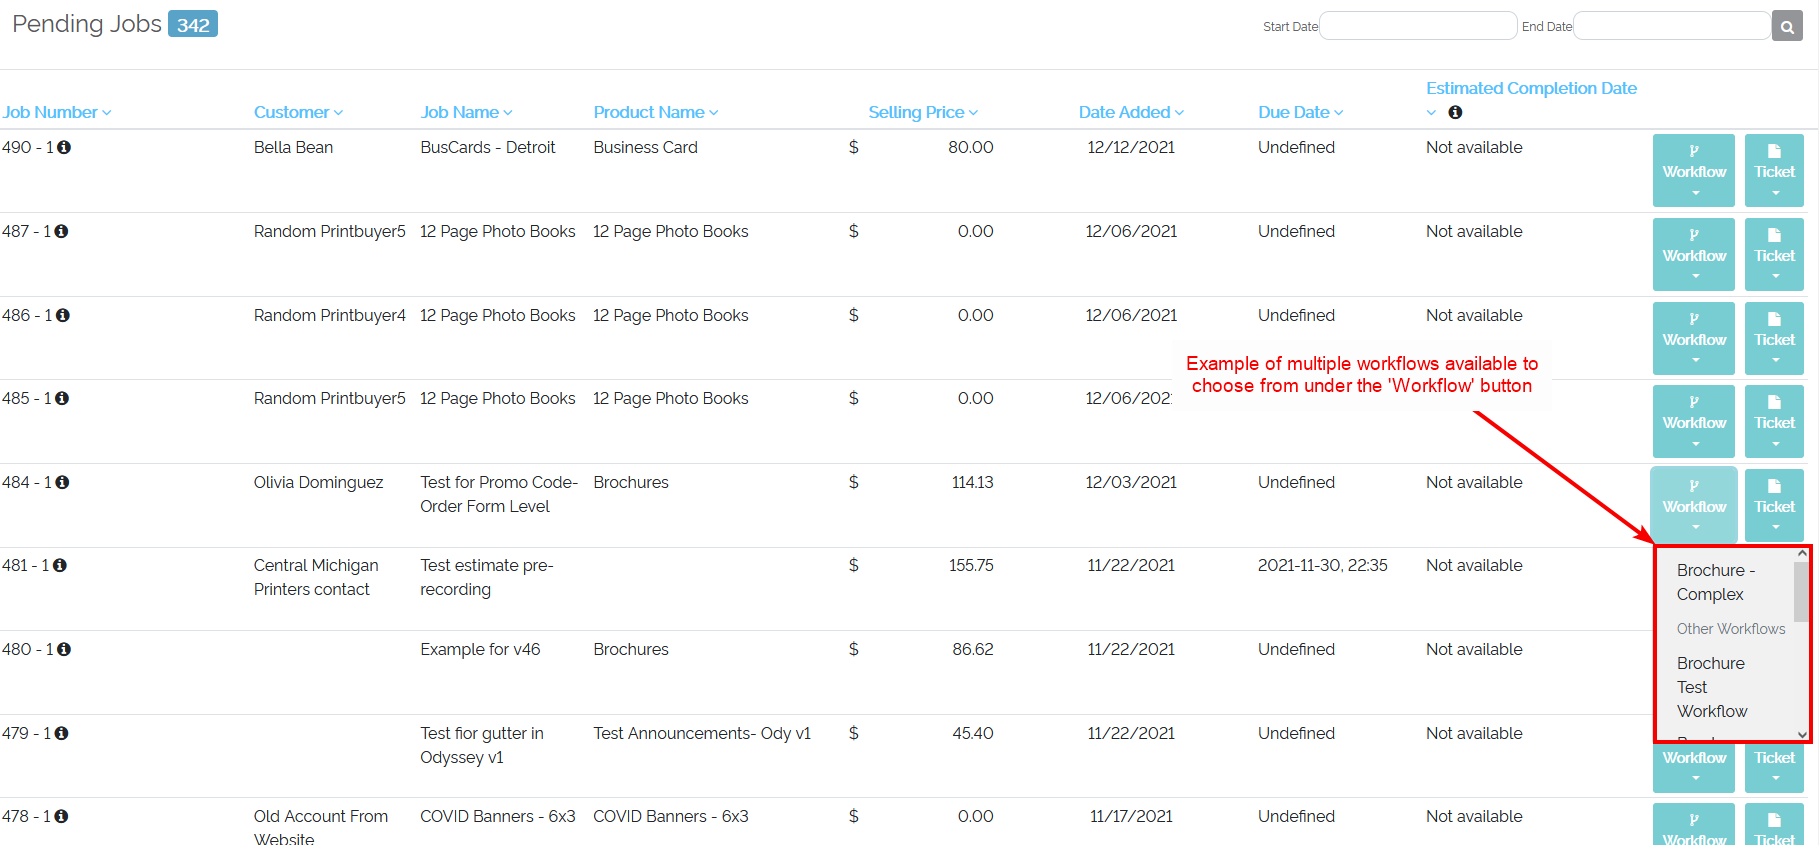
Example of multiple workflows under the 'Workflows' drop-down
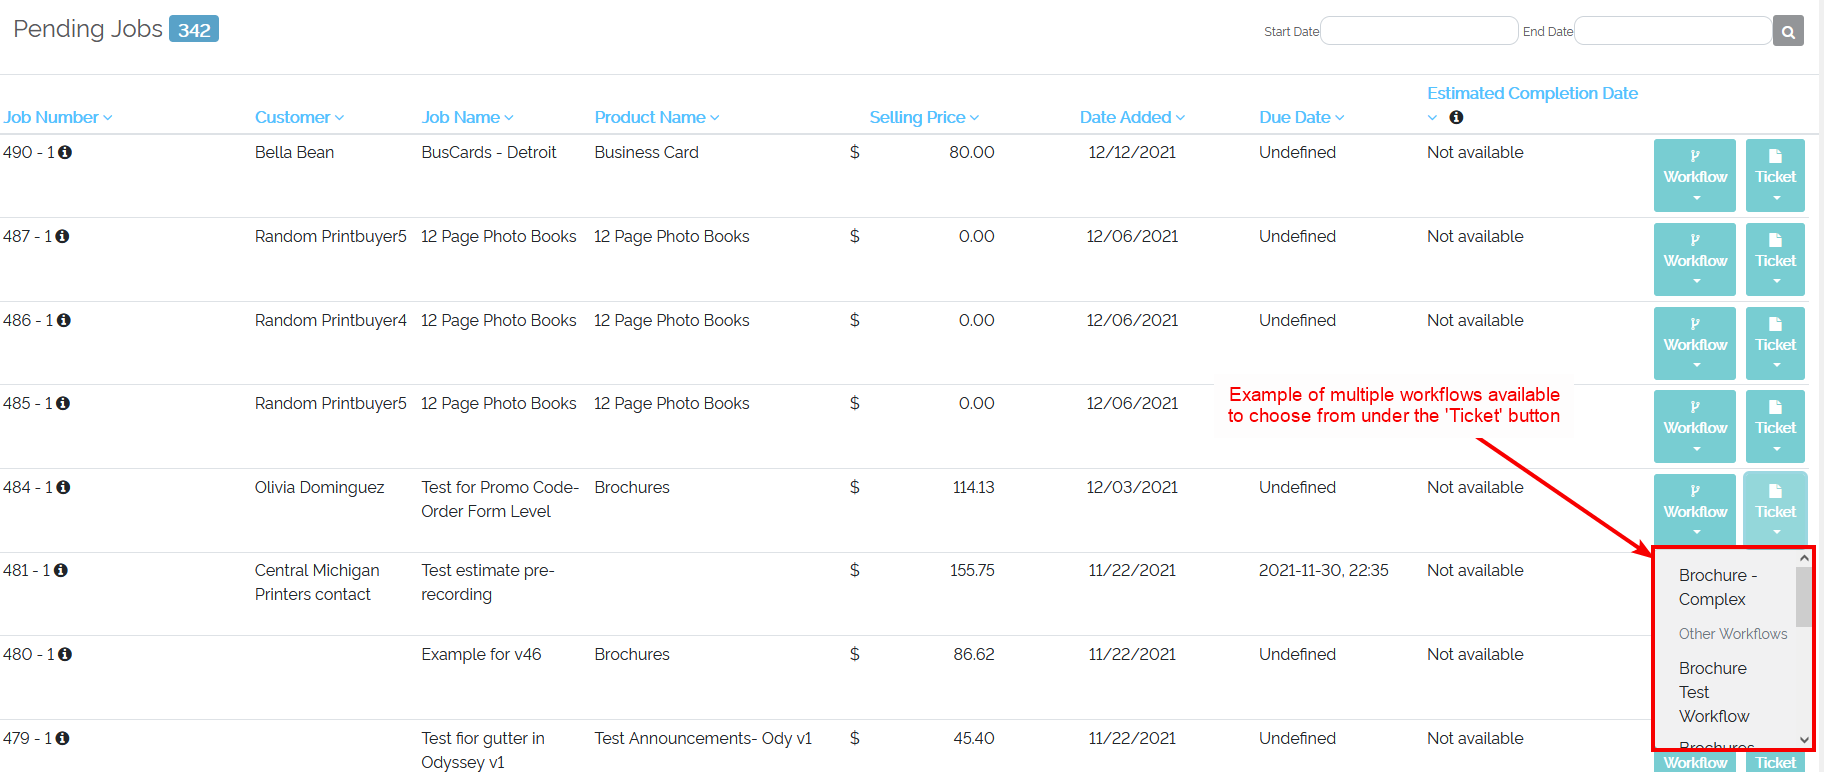
Example of multiple workflows under the 'Ticket' drop-down
Starting a Pending Job
Jobs that are 'Pending' can start if the workflow for the job has a green light bulb. It's at this point in the lifecycle of a job that it can officially start production.
To start a Pending job:
- Select 'Jobs'
- Select 'Pending'
- Select the Workflow button next to a job
- Choose a workflow to apply to the job
- Ensure the light bulb is green
- It's at this point a user may want to verify the price, estimated cost, profit and any other variables in the workflow for the job before starting the job
- Select the green 'Start job' in the upper-right corner
- The job is now considered 'In Progress'
- Select 'Start' to start the first process for the job
- Select 'Finish' when that process is complete
- Continue starting and finishing the remaining processes for the job
- As soon as the last process in the job is complete, the job will change from 'In Progress' to 'Completed'
Refer to the video below on how to start a job, start and finish each process of a job and complete a job.