
Once processes have been added to the Workflow, a user will need to 'Link' them so that Odyssey will know which path the job will take from start to finish.
Using the following screen capture as an example, we'll link the following processes:
- Cut Parent to Run Size
- Digital Printing
- Trim Press Sheet to Finished Size
- Half Fold
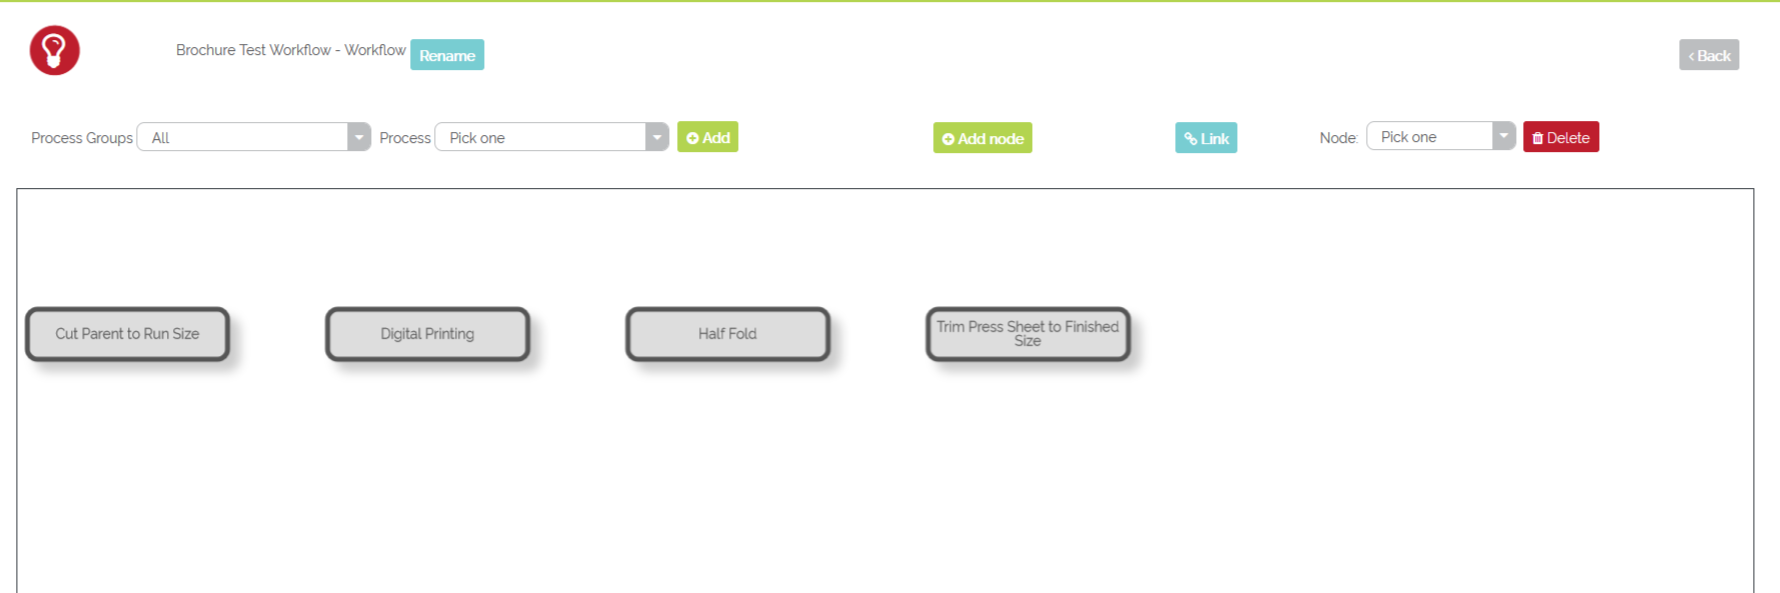 Example of an unlinked simple Brochures - Digital Workflow
To link from one process to another:
- Select 'Link'

- User will be in the 'Link Process' screen
- Select a process from the 'From:' drop-down
- This would be considered the first process a job needs to go through
- Example: Cut Parent to Run Size
- Select an output from the 'Output:' drop-down
- Many times this will be a Component
- Example: (Component) Unprinted Press Sheet
- Select a process from the 'To:' drop-down
- This would be the next process a job will enter after completing the previous process
- Example: Digital Printing
- Select an input from the 'Input:' drop-down
- Many times this will be a Component
- Example: (Component) Unprinted Press Sheet
- Select 'Link'
- Continue with the above steps until all processes are linked
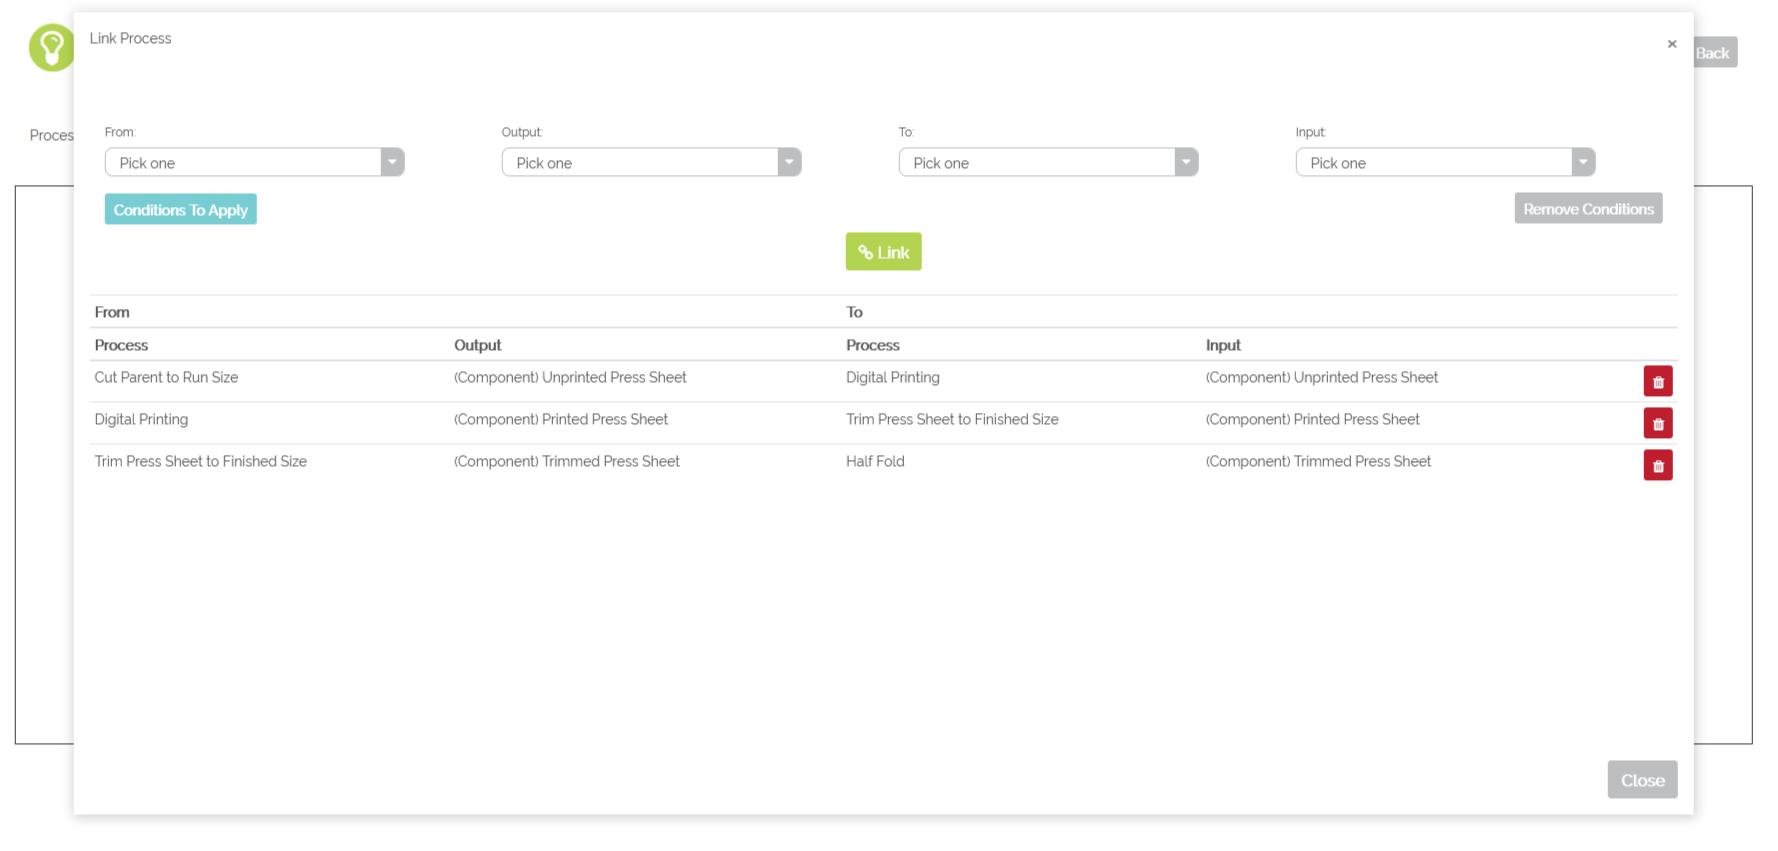
Example of four linked processes within a simple 'Brochures' Workflow
Once linking has been performed, arrows will be present, pointing from one process to another. This is telling Odyssey the path the job will need to take from start to finish.
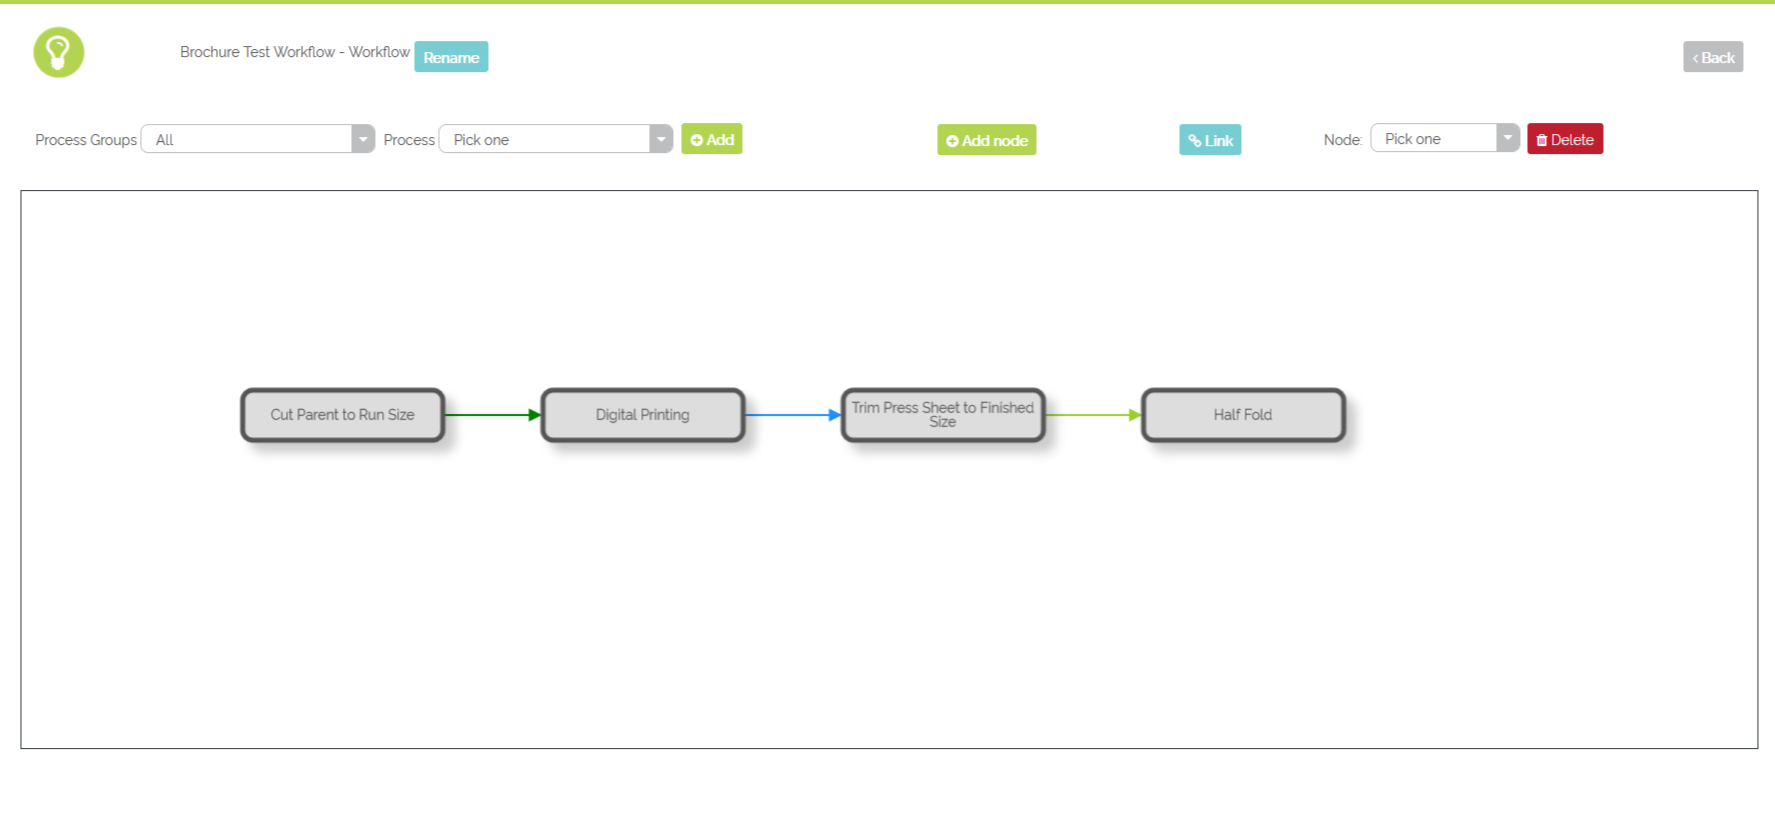 Example of a linked simple Brochures - Digital Workflow