
Resource Groups
Resources are contained within 'Groups' so that XJDF language can determine what exactly is needed each stage of the way as a job moves through the printshop.
- The 'Ink' Resource Group contains all inks needing to be used, such as PMS inks.
- The 'Media' Resource Group contains all paper, foam, chloroplast, laminated, etc used at the printshop.
- Ideally, users should add Media in the size received from the paper vendor
- The 'Component' Resource Group will allow a user to add a resource in the context of:
- The description you would give the product at each stage of the printing process: is it an Unprinted Press Sheet, a Printed Press Sheet, a Trimmed Press Sheet, a Finished Product?
- The 'Device' Resource Group houses all the equipment used at the printshop. Think of this as a list of resources that have On/Off switches.
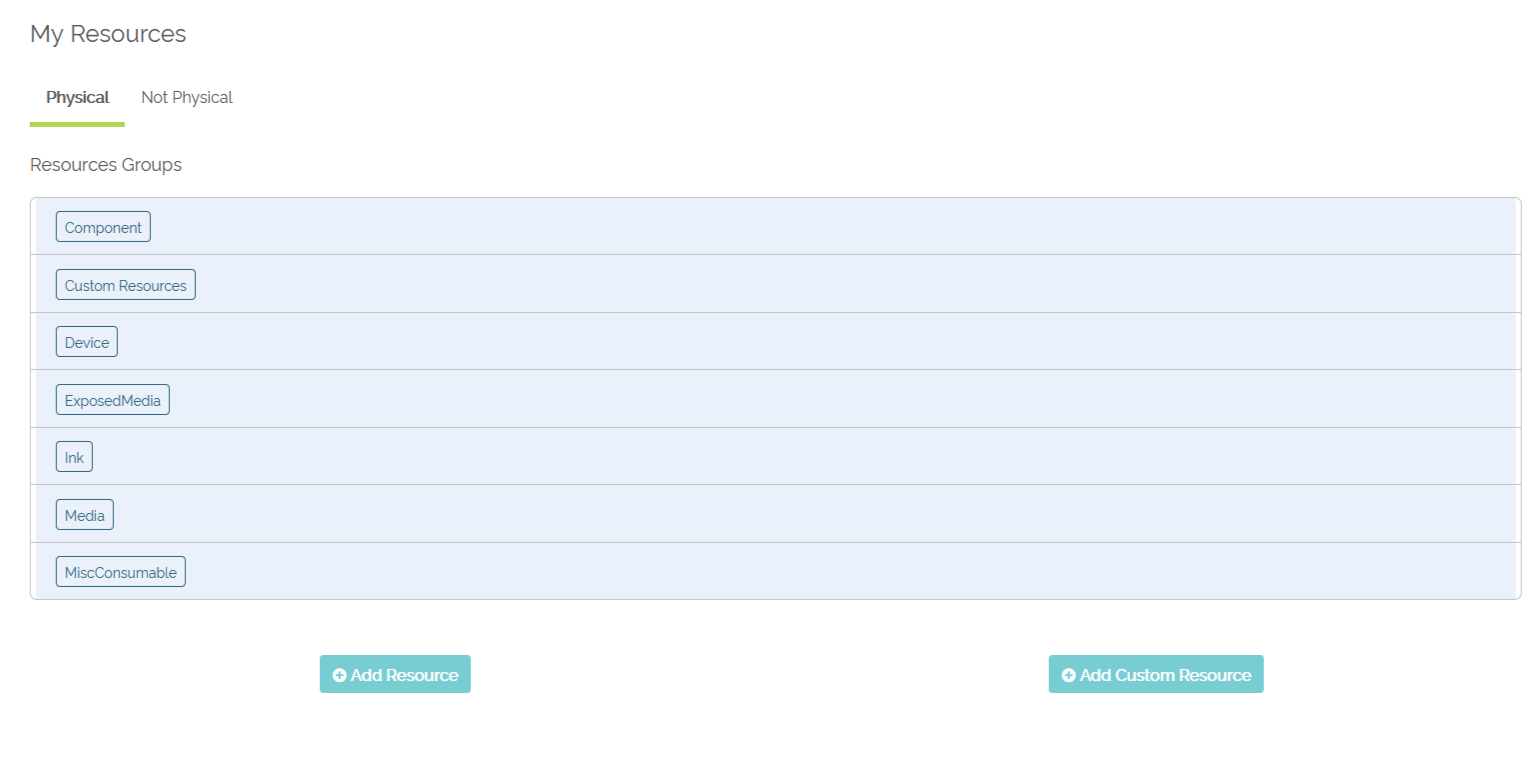
Example of Resource Groups
Device Group:
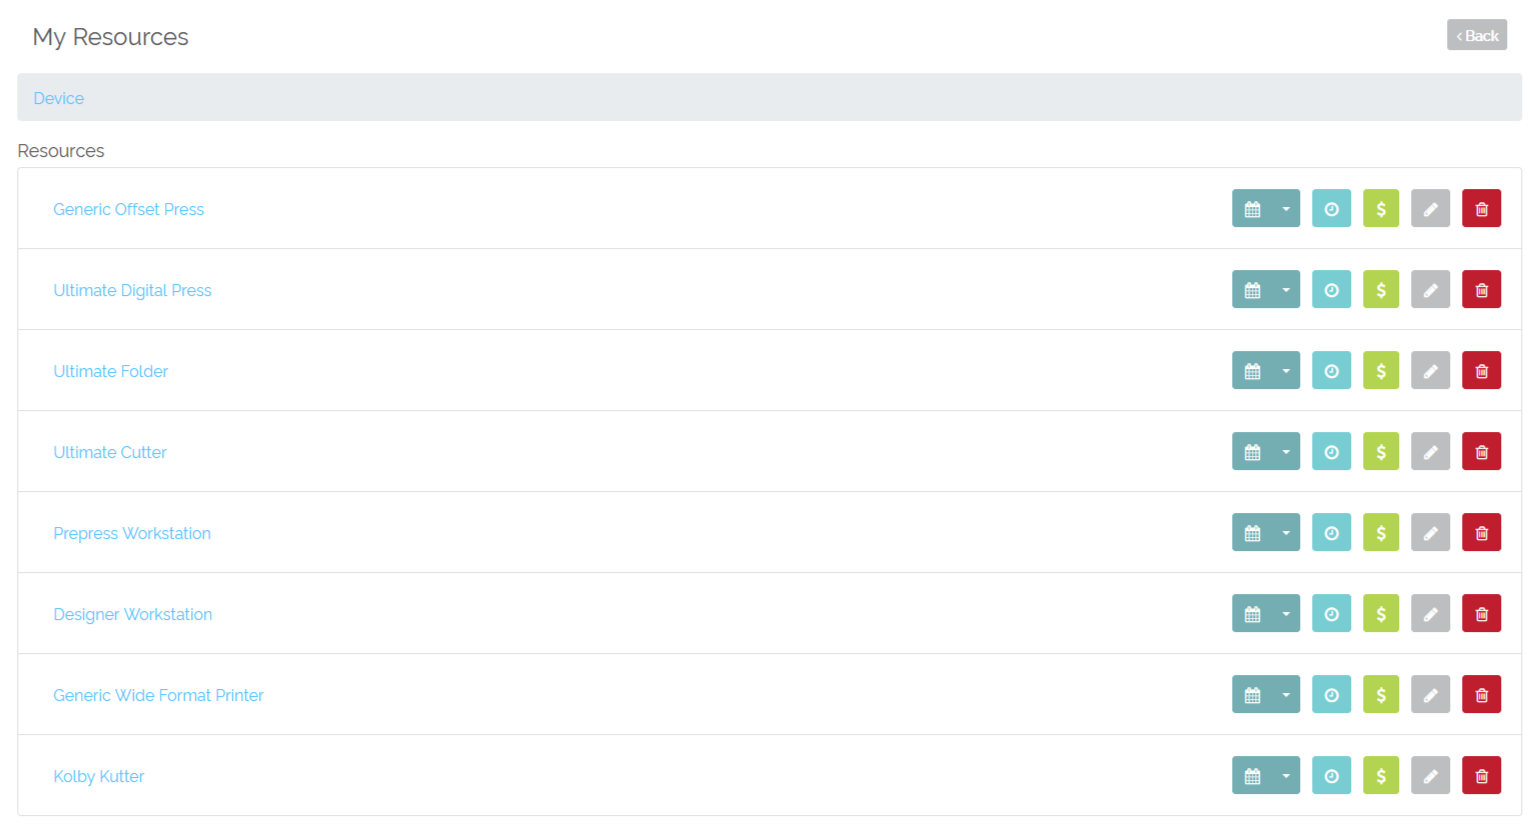
Example of a list of devices within the 'Device' Resource Group
Ink Group:
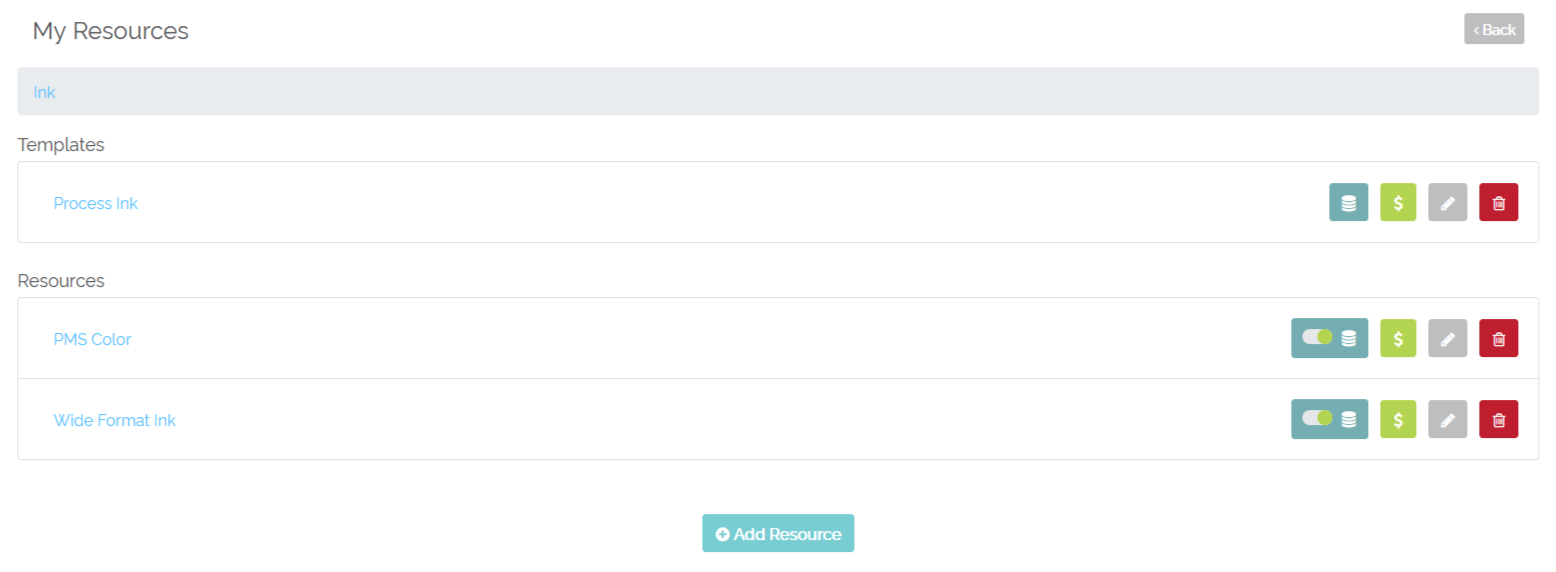
Example of Ink within the 'Ink' Resource Group
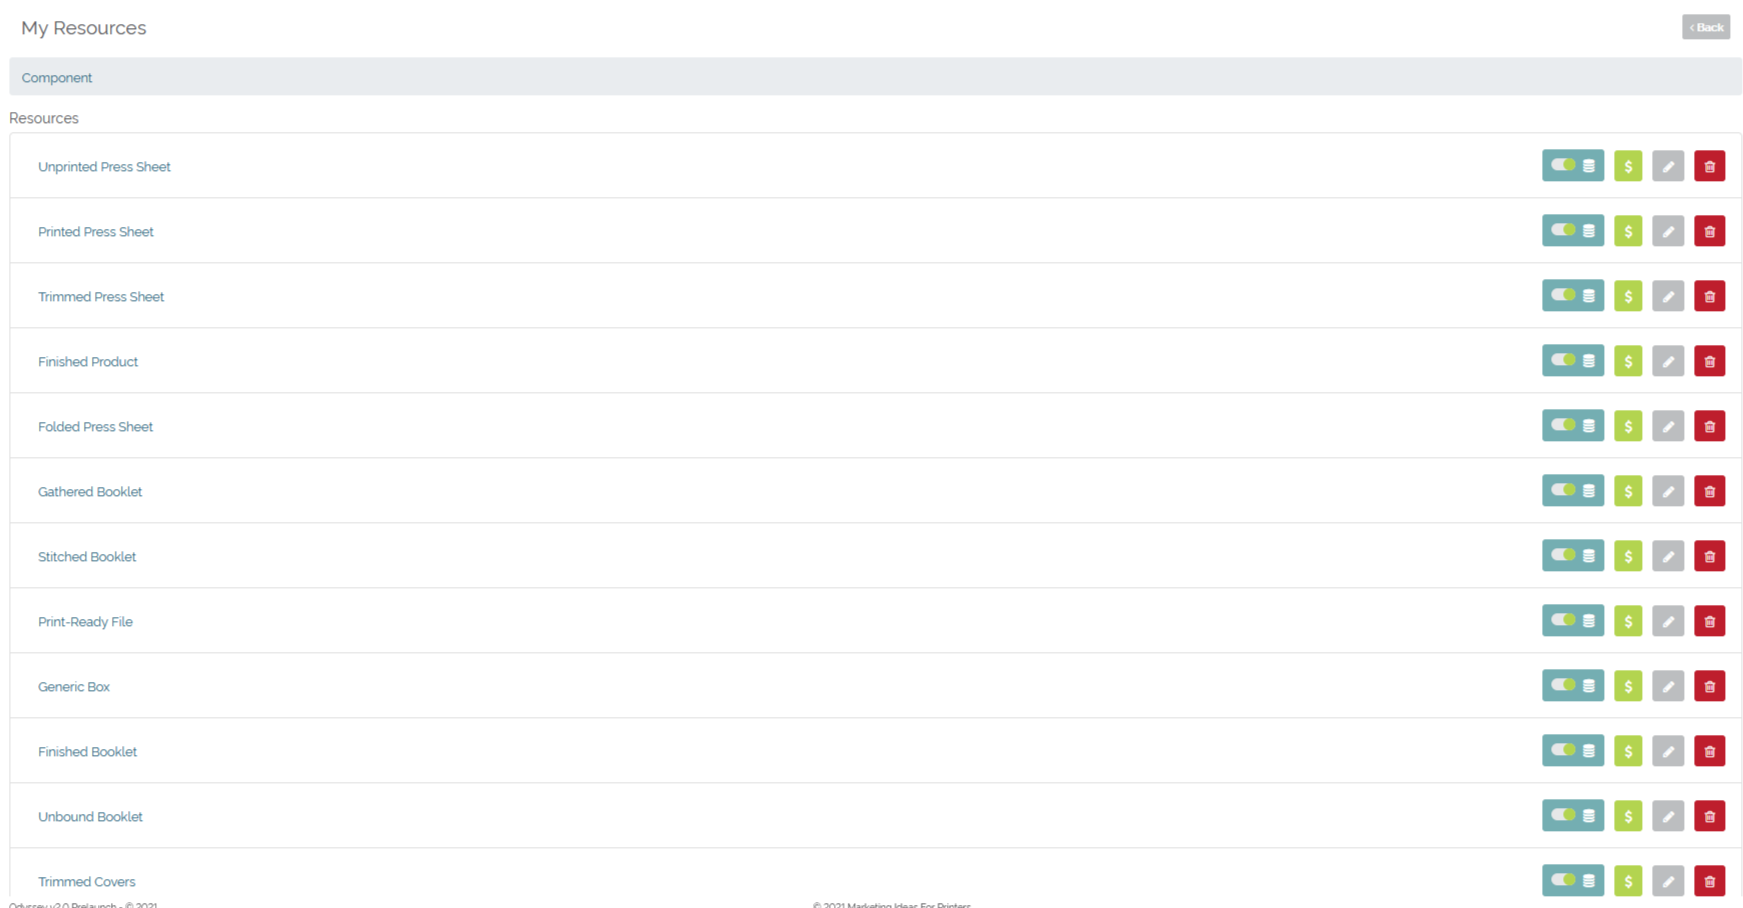
Component Group:
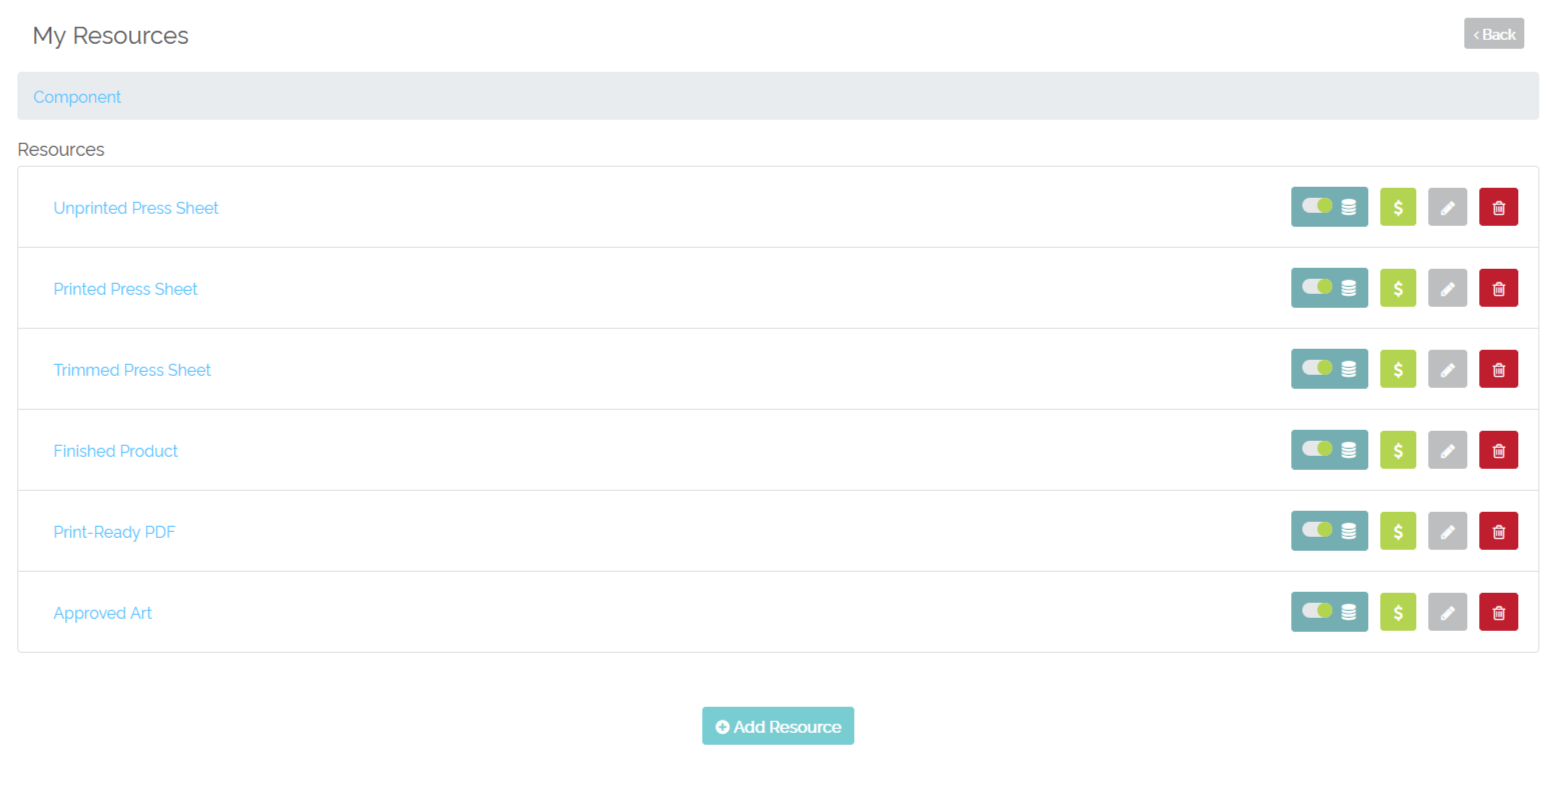
Example of Components within the 'Component' Resource Group
Example 2 of Components within the 'Component' Resource Group
Media Group:
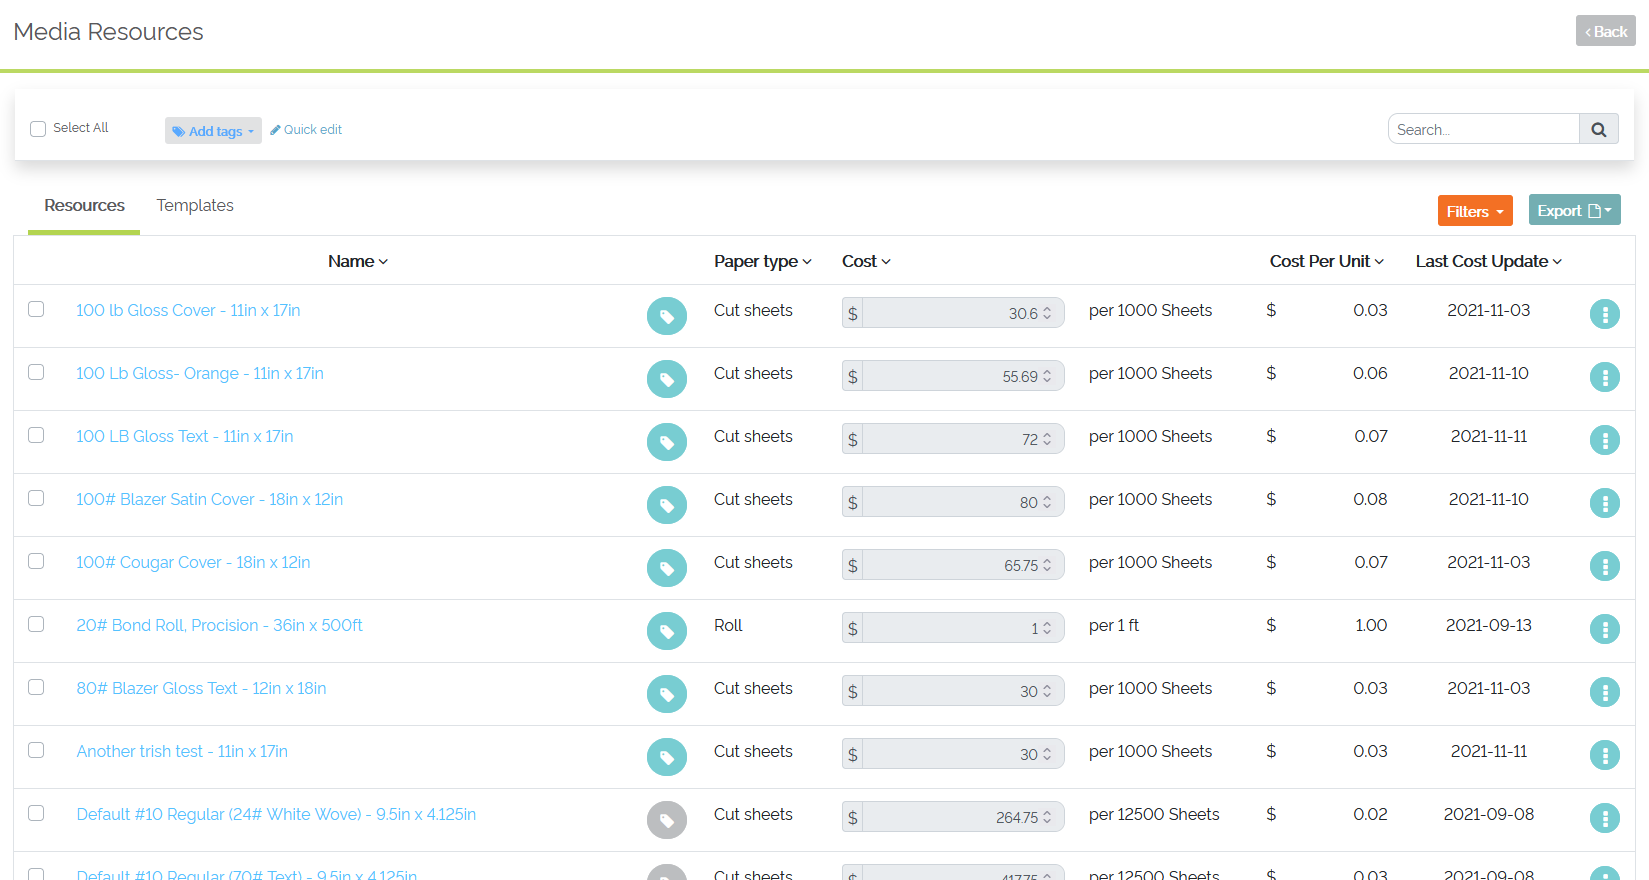
Example of papers within the 'Media' Resource Group
Misc Consumable Group:
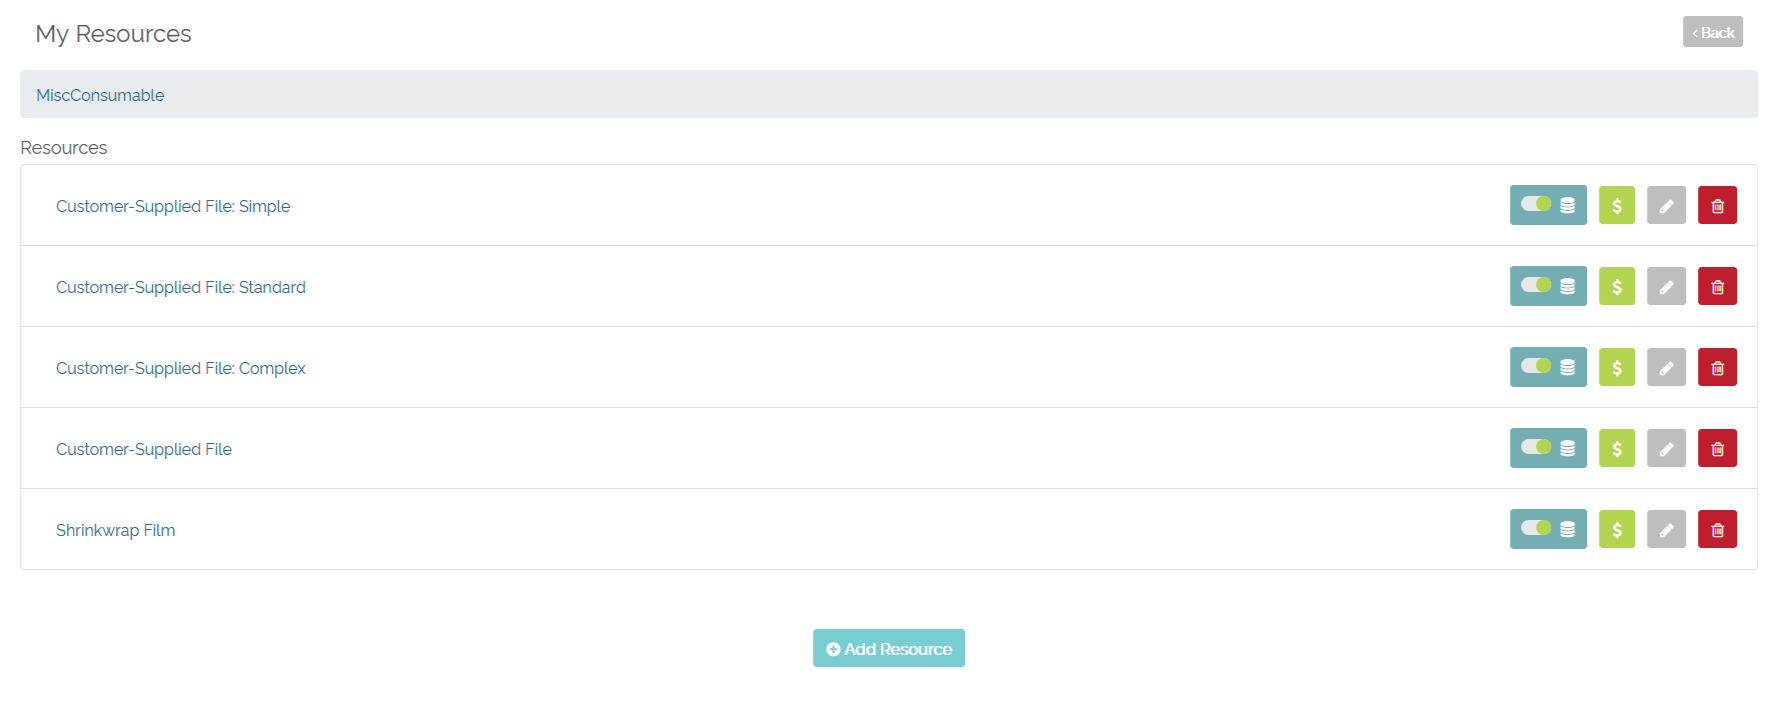
Example of resources within the 'MiscConsumable' Resource Group
Example of adding a resource: Adding a Media Resource
To add a Media resource:
- Select 'Printshop'
- Select 'My Resources'
- Select 'Media'
- Select 'Add Resource'
- Select 'Single resource'
- Select which resource group this resource will belong to under 'Resource group'
- For a 'Media' type of resource, leave the drop-down selection at 'Media'
- Select a template under the 'Template' drop-down if this resource will be created from an existing template
- Select 'Next Step'
- Enter the name of this resource under 'Media name'
- Provide a description if needed under 'Description'
- Enter in tags under 'Tags'
- Toggle 'Roll' to 'Roll' if entering a roll-type of media
- Enter in the resources unit of measurement under 'Resource units of measurement'
- The unit of measurement would be considered how is that particular resource measured as it moves through Odyssey - is it a sheet, a cut, a fold, a click, an impression, and so on.
- Using the examples mentioned above, the 'Unit of Measurement' would be Sheets, Cuts, Folds, Clicks, Impressions, and so forth.
- Toggle 'Decimals' to green if this resource needs to be calculated with decimals in mind
- Enter in the width and length under 'Width' and 'Length'
- Select a unit for the Width and Length under 'Unit'
- Note: If this is a Roll type of media, the 'Attributes' for this resource will ask for the roll length and width
- Roll media will also take the length 'Unit' as it's unit of measurement
- Enter in the media thickness under 'Thickness'
- Select a thickness unit under 'Unit'
- Enter in the weight (in gsm) of this resource under 'Weight'
- The weight entered here will be used to calculate the weight of the job within each process of a job workflow said resource
- Enter in the color of this resource under 'Color'
- Select 'Next Step'
- Select a chart of account under 'Select an account for this cost' drop-down
- If this media resource should be considered of no cost, toggle the 'No Cost' to 'Yes'
- Enter in a cost and quantity under the 'Cost' section
- Toggle the 'By Area' to 'Yes' if this media resource should be calculated as an area-based calculation
- Normally this would be set for a Roll type of media. However, if your sheet media needs to be calculated by area, than the toggle is available for these purposes.
- Enter in a quantity under 'Minimum Amount to Use' if you would like a minimum amount of this resource to be used each time it's used in a workflow
- Enter in a quantity under 'Units per block' if you would like the media resource to be used in blocks
- Select 'Save Resource'
- The recently added media resource will now show up in the tab 'Resources'
Example below of adding a new 'Media' resource:
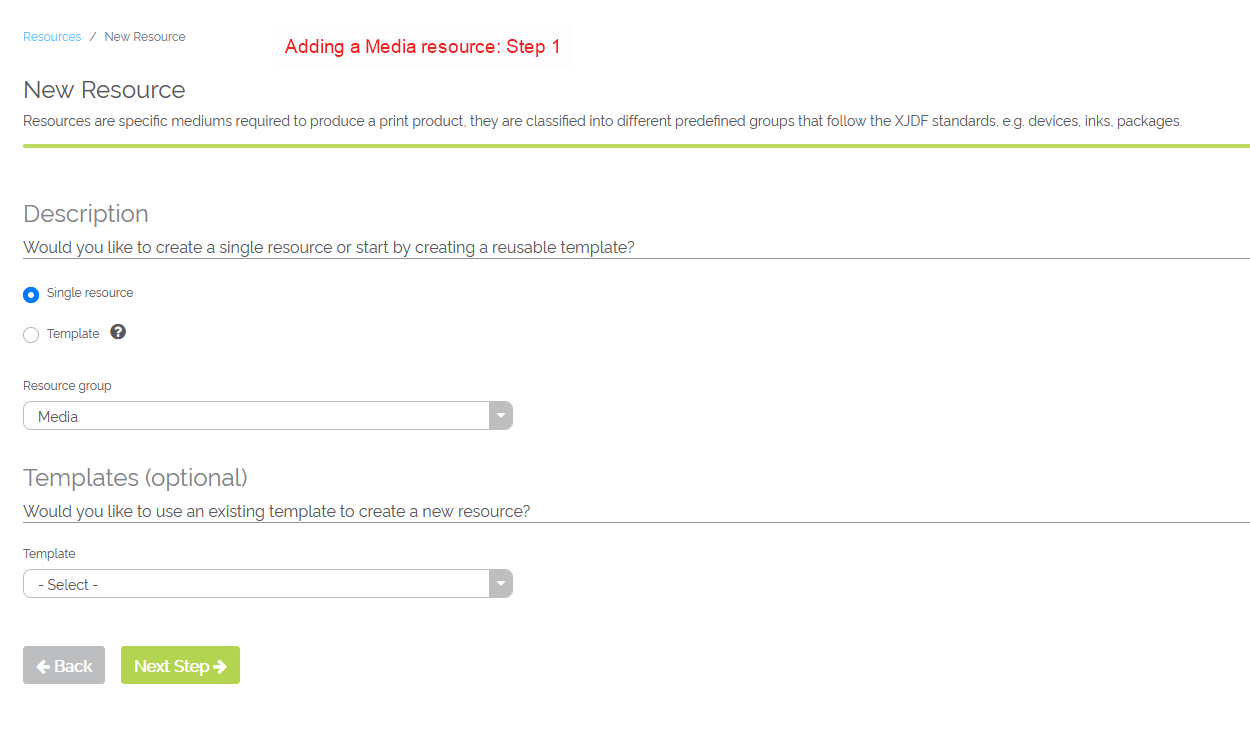
Example of adding a Media resource: Step 1
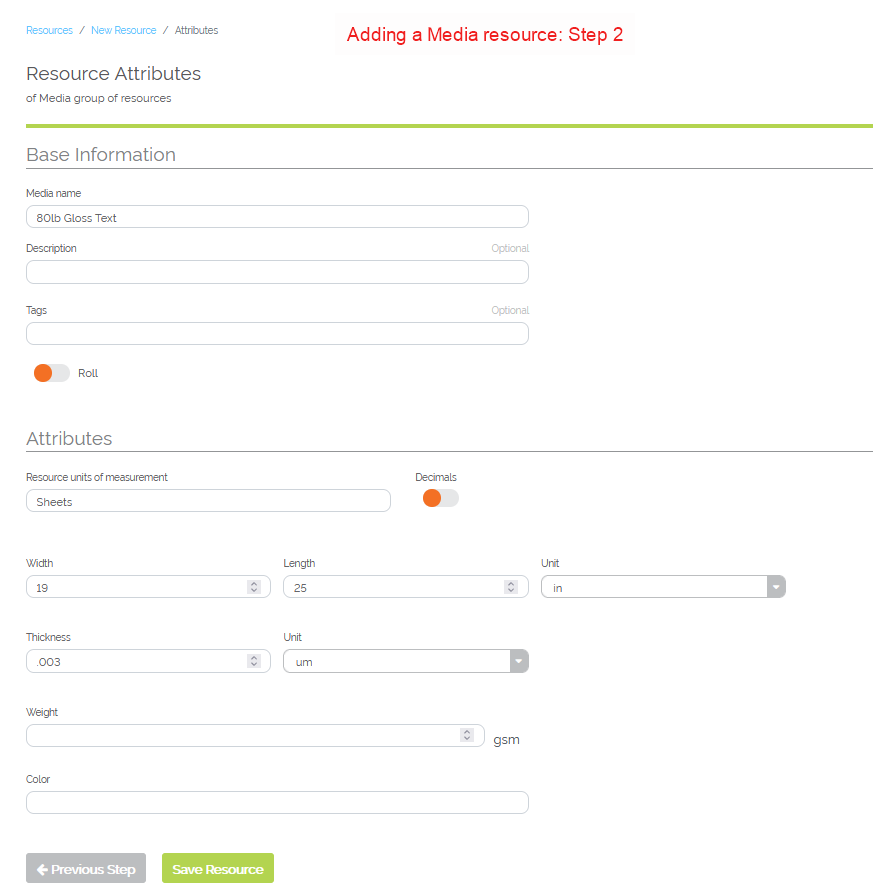
Example of adding a Media resource: Step 2
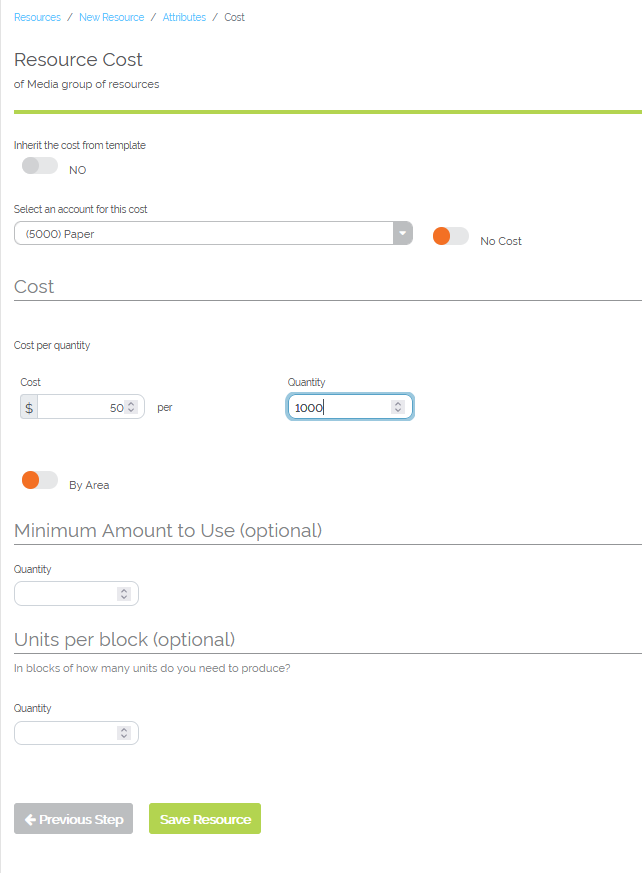
Example of adding a Media resource: Step 3
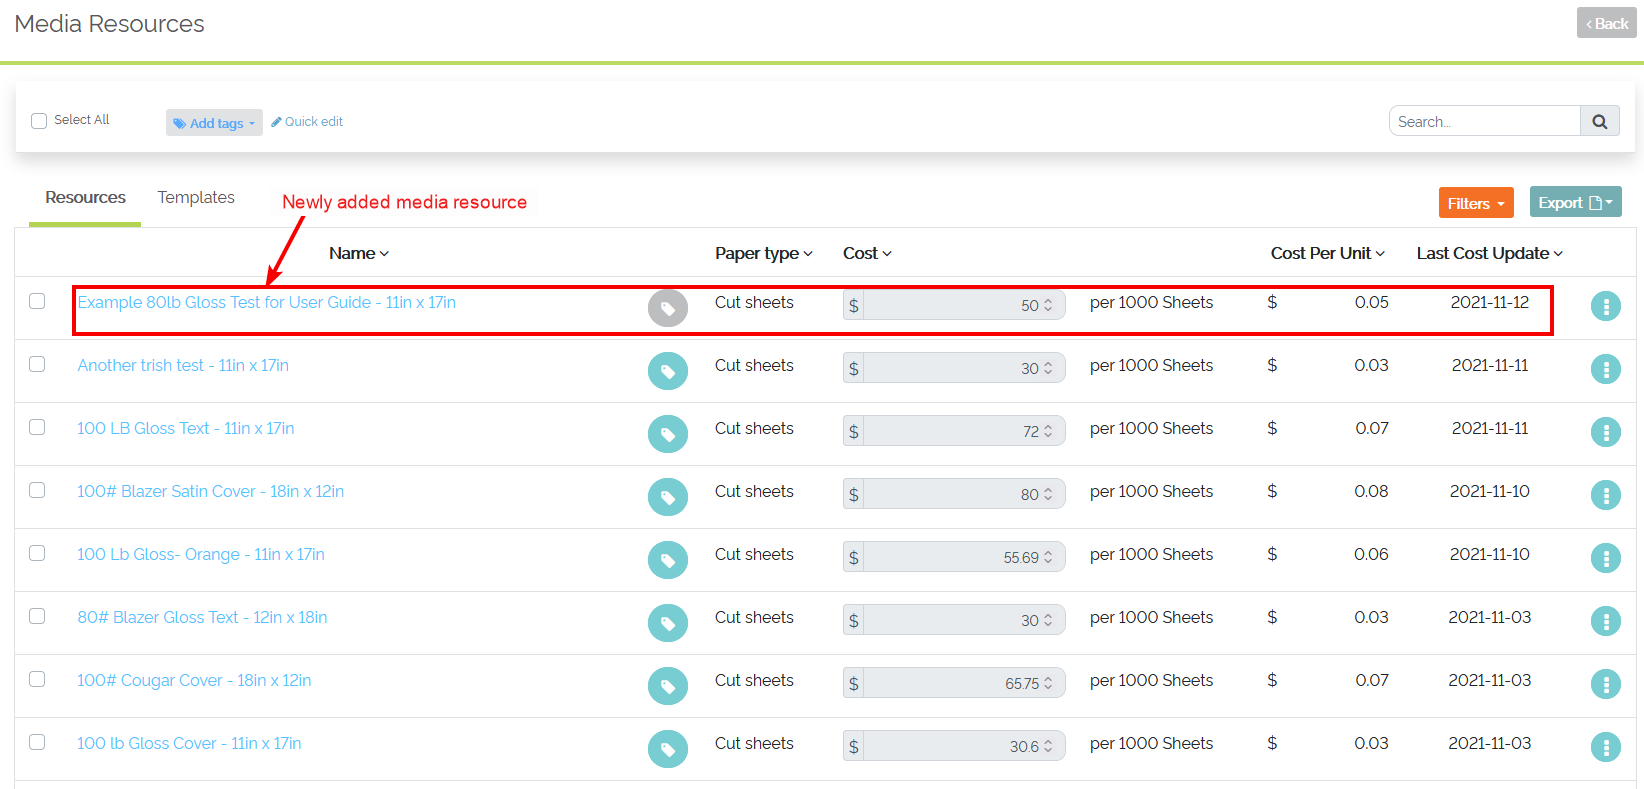
Newly added Media resource showing in the list