
After the Conditions are setup for the Simple Workflow, the next step is to add Processes. To do this, select the "Add one or more processes" button in the "Processes" screen of the Simple Workflow Wizard.
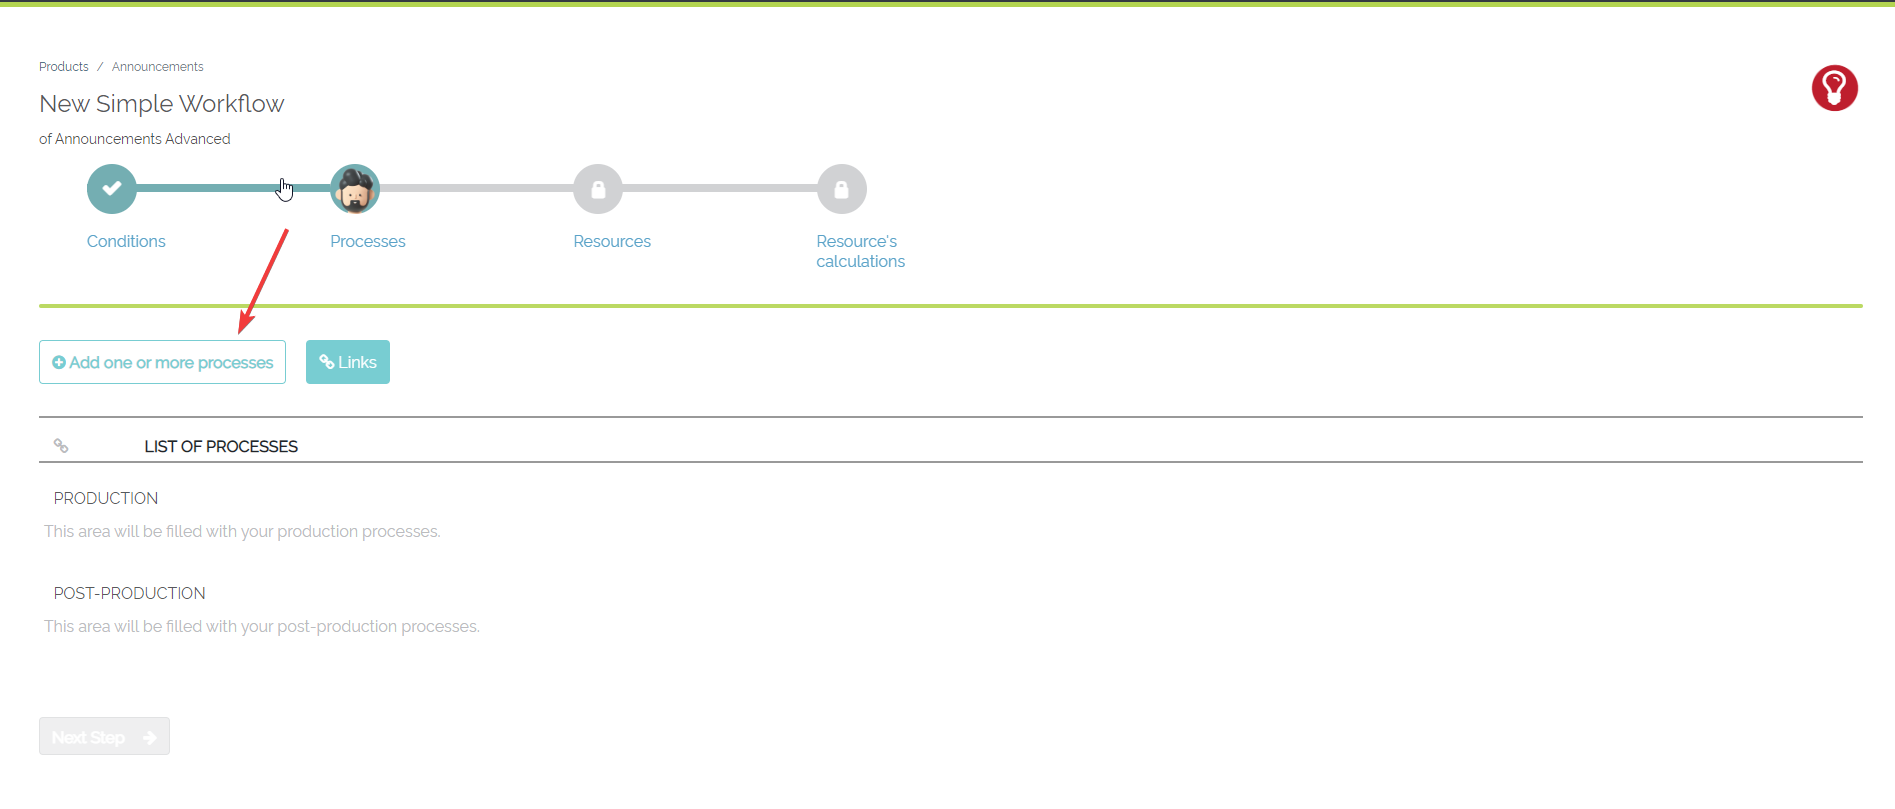
Example of the Process Page of the Simple Workflow Wizard
Clicking this button will give a user a Pop-Up that lists all available Processes, categorized by Process Group. Simply click on the Process needing to be added in the "Available Processes" column, and it will be added as a "Selected Process". A user can also create a new Process from this screen by clicking the "Create New Process" button.
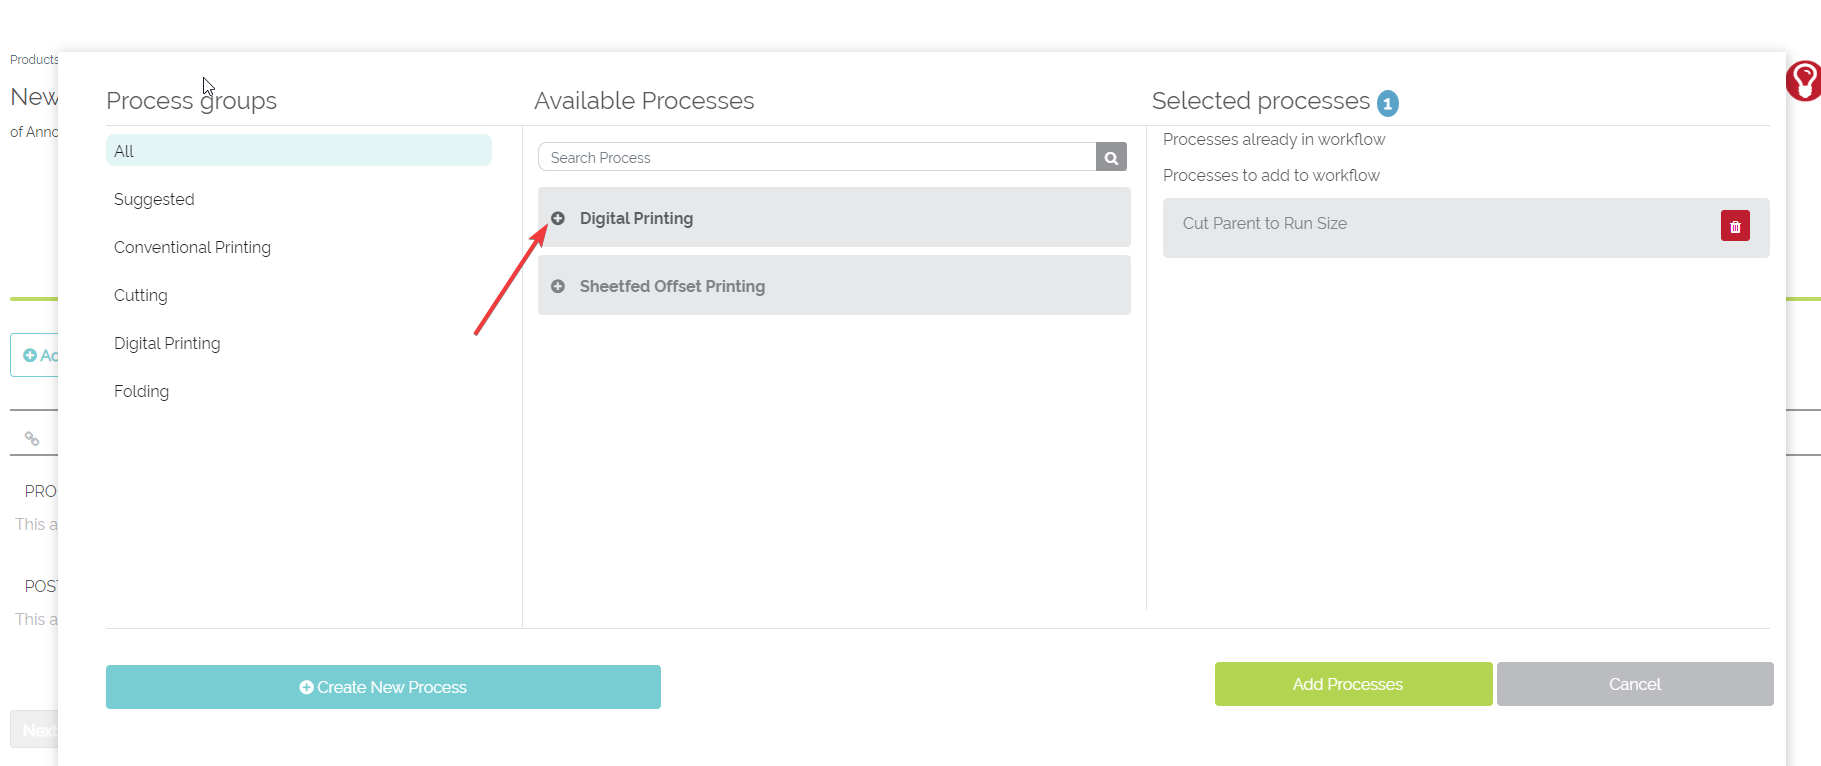
Example of the Add Processes Pop-Up
Once a user has added all of the Processes to the "Selected Processes" column, click on the green "Add Processes" button to add these Processes to the Workflow. These Processes will now be visible in the list of Processes on the main "Processes" screen.
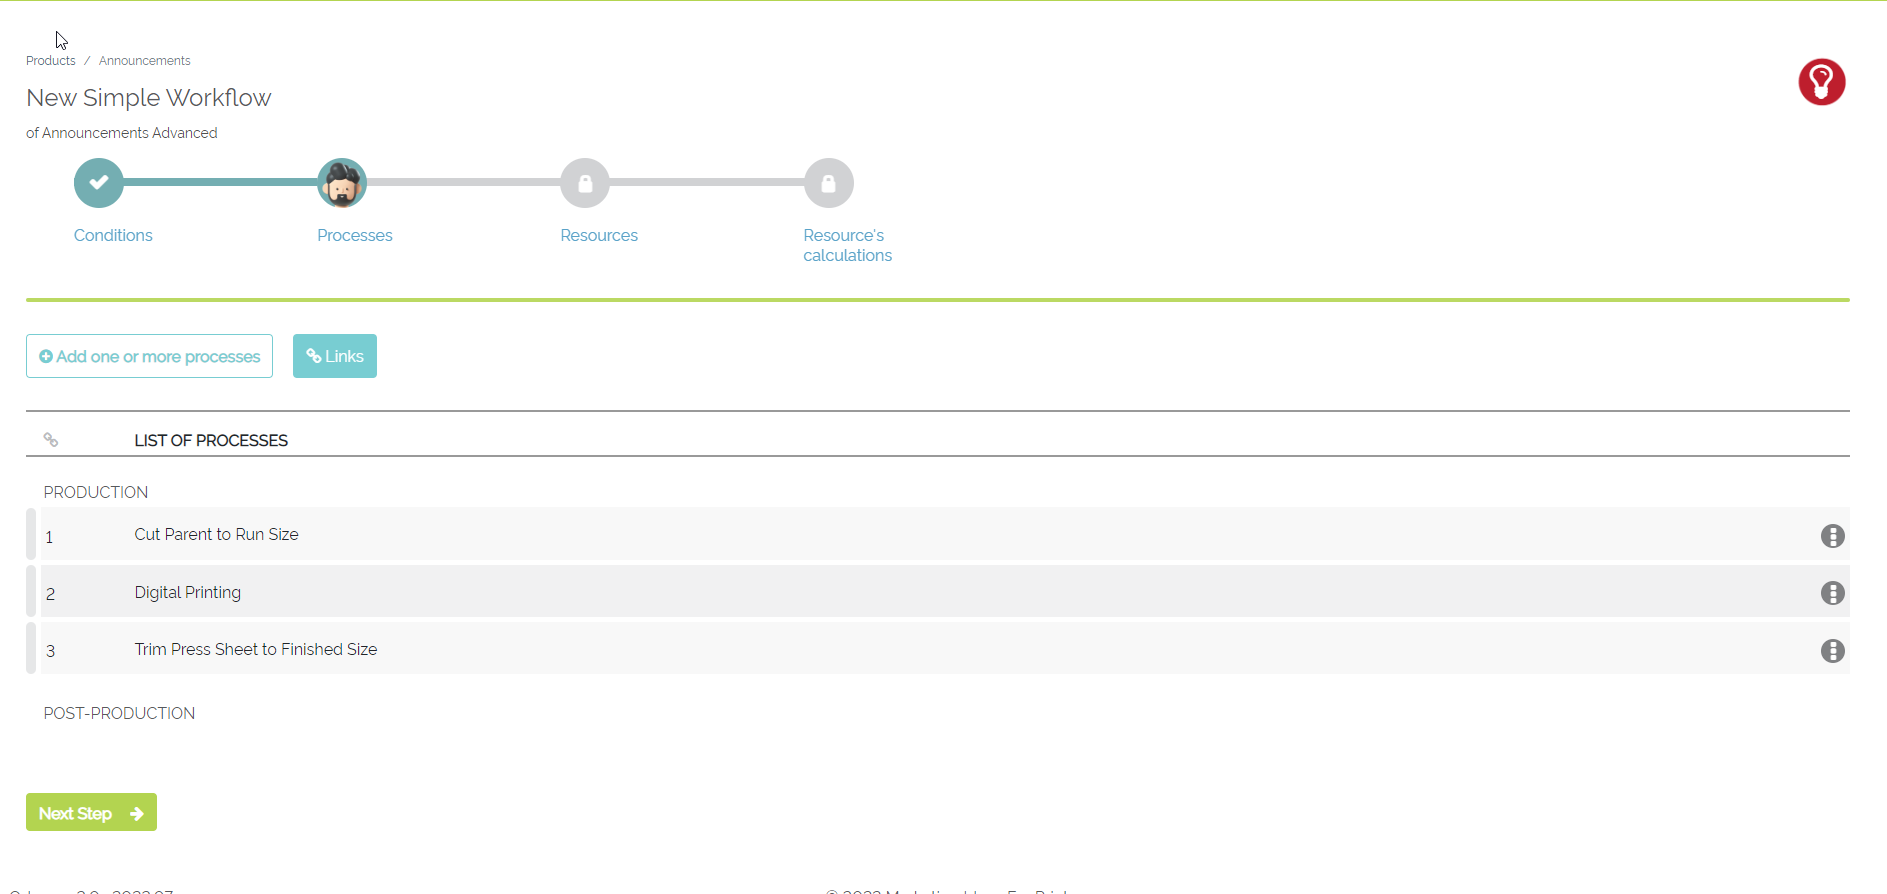
Example of the main Processes Screen with Processes Added
From here, there are a few additional things that can be done:
1. Add more Processes at any time by clicking the "Add one or more processes" button.
2. Reorder these Processes by dragging and dropping them into the correct order.
3. Link these Processes by clicking on the "Links" button.
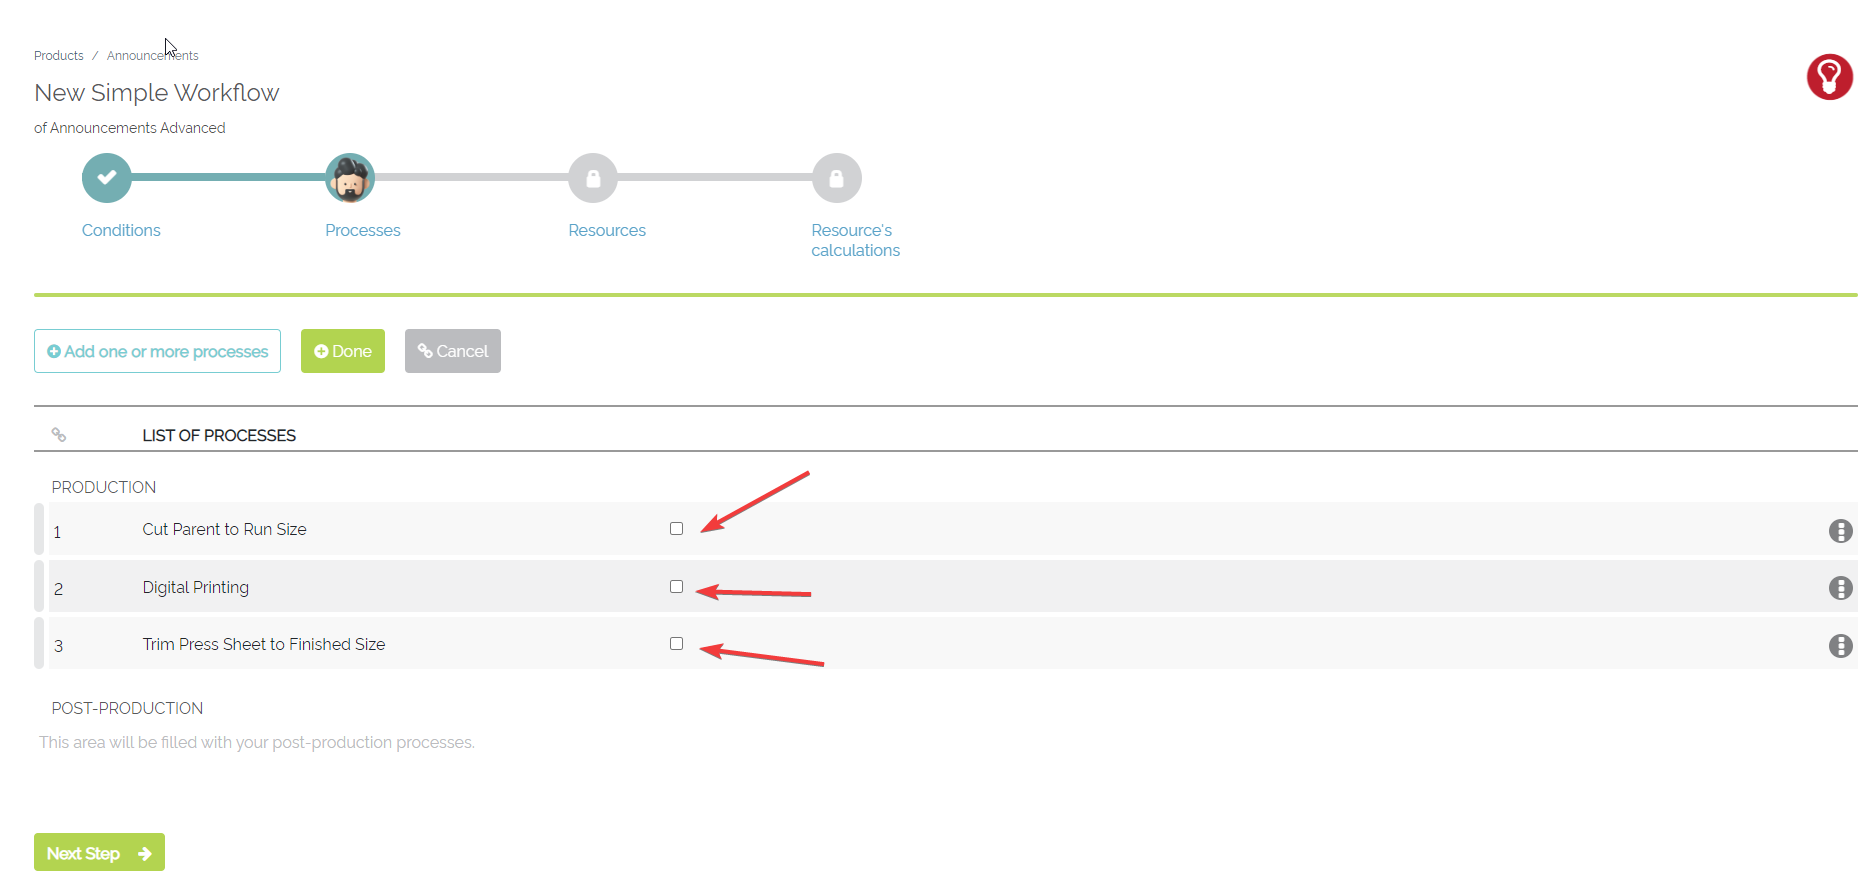
Example of the Link Checkboxes
- Once this button is clicked, checkboxes will appear next to all of the active Processes. Simply click on the checkbox next to the two Processes needing to be linked, and Odyssey will link them automatically.
- After all processes are linked, click the "Done" button to finish.
- A user can always remove the links by clicking the "Remove Links" button found next to the "Links" button. (Please note: This Remove Links button will only display if links are already established).
4. Click the "three dots" next to any Processes needing to be edited. From this "three dots" Drop-Down, a user can:
- Add Calculations to the Process
- Edit the Process
- Delete the Process
- Set the Process as a Post-Production Process
Once all Processes have been added, edited, and linked, click the "Next Step" button to move onto the next screen in the Simple Workflow Wizard, titled "Resources". Click here to learn more on setting up Resources.