
Step 1: Selecting up to 6 Custom Products
Overview
As an alternative to selecting a single product, Odyssey allows you to create an estimate that includes up to six custom products. This option provides flexibility to specify multiple products within a single estimate, offering detailed information for each custom product.
Key Features and Components
Customer Information
- Displays the selected customer's name and contact information at the top right of the screen for reference.
Estimate Information Section
- Estimate Name: Enter a name for the estimate (e.g., "Business Packet").
- Estimate Date: Automatically populated with the current date.
- Estimate Expiration Date: Enter the date when the estimate expires.
Product Information Section
- Product: Select
Custom Product(s)from the drop-down menu to enable multiple product entries. - Product Name Fields: Enter names for up to six custom products.
- Quantity Fields: Enter different quantities for the estimate (e.g., 500, 1000, 2000).
- Delete Button: Remove any product entry if not needed.
Additional Information Section
- Notes: Add any additional notes or special instructions related to the estimate.
Navigation Controls
- Previous Step Button: A button to go back to the previous step.
- Next Step Button: A green button labeled
 to proceed to the next step of the estimate creation process.
Steps to Enter Custom Product Information
Enter Estimate Name
- Type a descriptive name for the estimate in the
Estimate Namefield.
Specify Estimate Expiration Date
- Adjust the
Estimate Expiration Date(if needed) to specify how long the estimate is valid.
Select Custom Products
- Click on the drop-down menu under
Productand selectCustom Products.
Enter Product Names
- Fill in the names for each custom product (up to 6 custom products) in the
Product Namefields (e.g., Flyers, Brochures, Business Cards, Letterheads, Envelopes, Notepads).
Enter Quantities
- Input the desired quantities in the
Quantity 1,Quantity 2, andQuantity 3fields. These can be different quantities to provide the customer with options (e.g., 500, 1000, 2000).
Remove Unnecessary Products
- If fewer than six products are needed, use the red delete button to remove any unnecessary product fields.
Add Additional Information
- If there are any special instructions or notes related to the estimate, enter them in the
Notessection.
Proceed to Next Step
- After completing all the required fields, click the
 button to proceed to the next step in the estimate creation process.
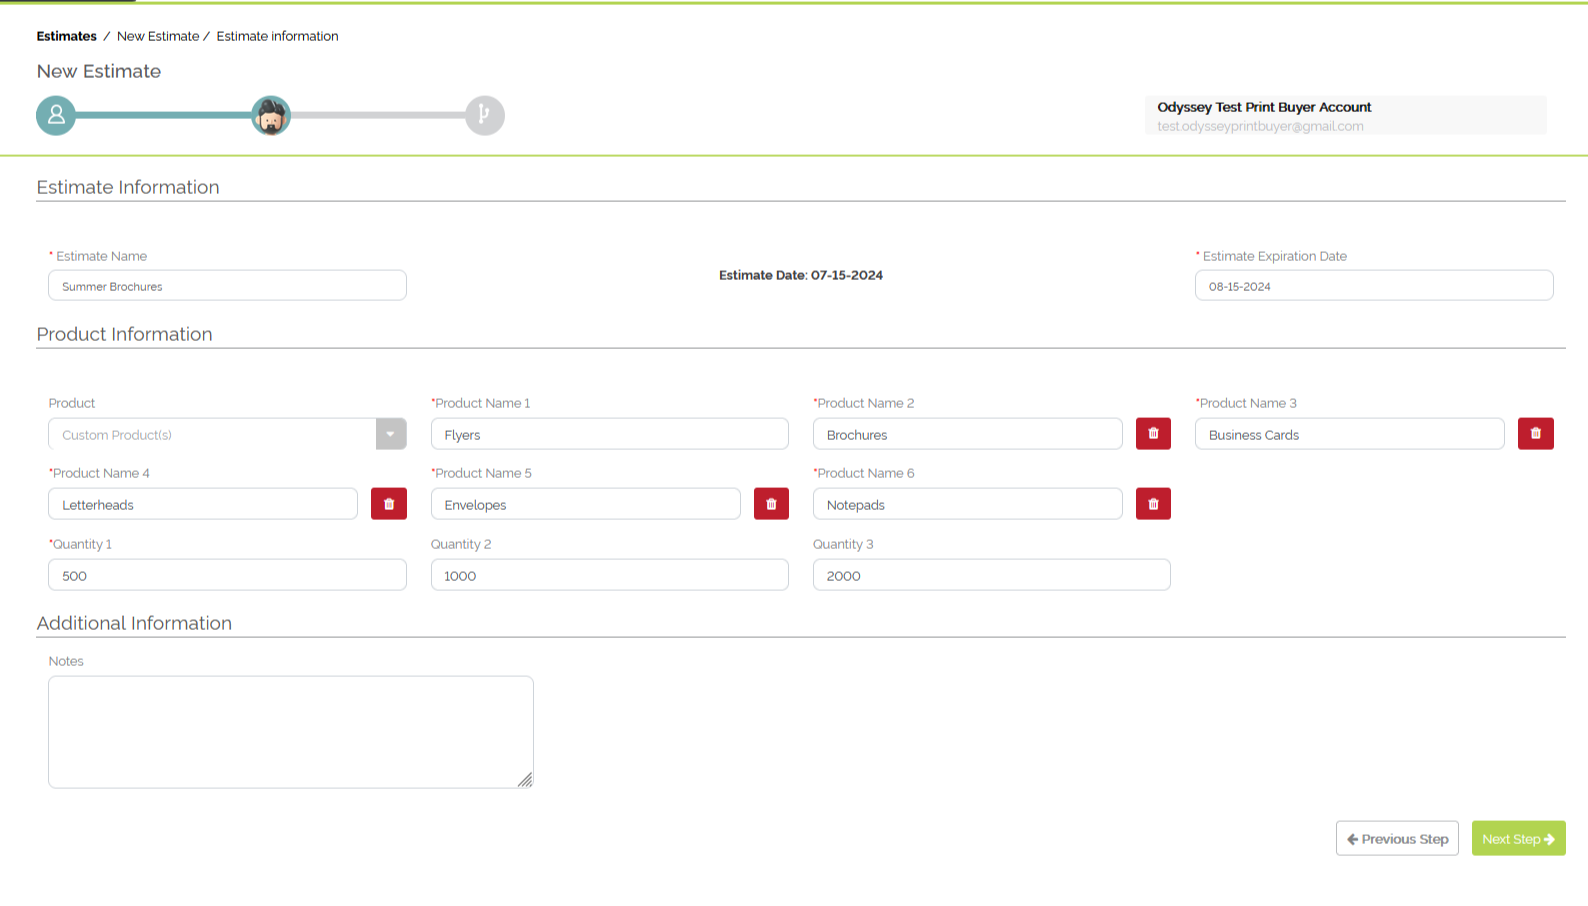
Example of adding 6 custom products for an estimate
Step 2: Selecting an Option for Custom Products
Overview: When creating an estimate that includes up to 6 custom products, Odyssey allows you to specify their quantities, processes, and more per product. This section provides detailed instructions on how to create an estimate workflow for these custom products, ensuring that all necessary details are captured accurately.
Selecting a Workflow Path
Select an Option to Start
-
Choose one of the options to begin the estimate workflow per custom product:
- Select a product drop-down: Select a product to view predefined workflow paths for the selected product.
- All Custom Workflows: Select to view all custom workflows available.
- Custom Estimates Workflows: Select to view all custom estimate workflows.
- Custom Jobs Workflows: Select to view all custom job workflows.
- Start with an Empty Workflow: Select to create a new workflow from scratch.
Choose a Workflow Path
- If a product was selected in the 'Select a product' drop-down and the product has a workflow path, choose the appropriate workflow path from the list (e.g., Digital Brochures).
Review Processes in Workflow Path
- Review the processes listed under "Processes in this workflow path" to ensure it matches the requirements for the estimate for the selected custom product.
Proceed with Selected Workflow
- Click the
 button to proceed with the selected workflow path per custom product.
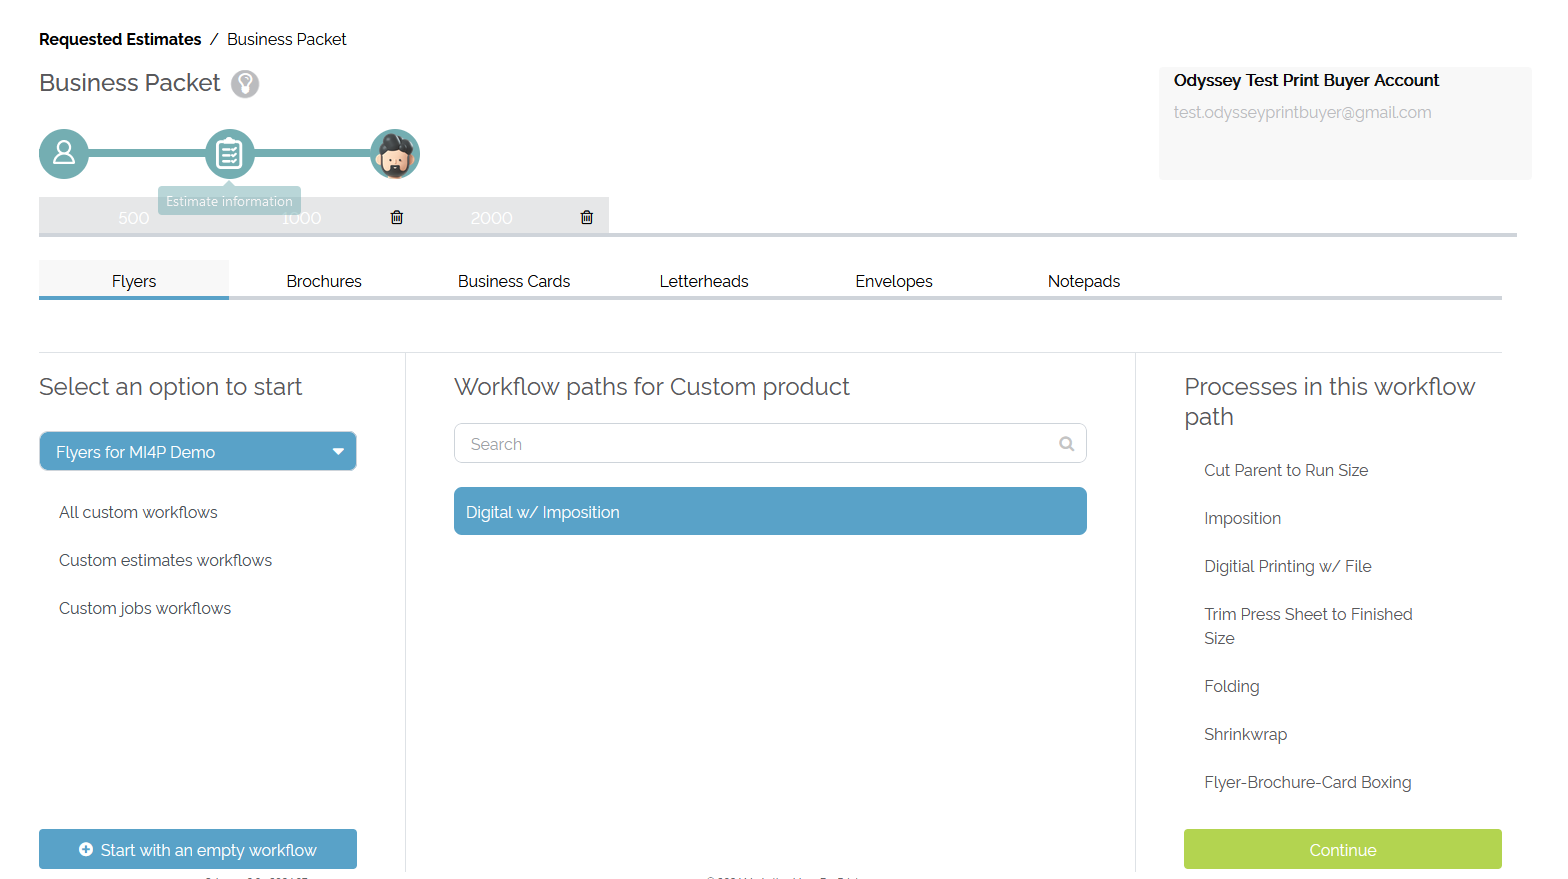
Example of a 'Flyers' custom product with a workflow path selected from the 'Flyers for MI4P Demo' product
Filling Out the Order Form
Select Product Specifications (varies per workflow path per product)
- Size: Choose the size from the available options (e.g., 8.5 in. x 11 in.).
- Color Options: Select the color configuration (e.g., Full-Color Front - Full-Color Back).
- Paper Options: Pick the paper type from the drop-down menu (e.g., 100# Gloss Cover).
- Bleeds: Indicate whether the product has bleeds by selecting the appropriate option (e.g., No).
- Folding: Choose the folding option if needed (e.g., None).
- And so on.....
Proceed with Order Form
- Click the
 button to proceed after completing all the required fields.
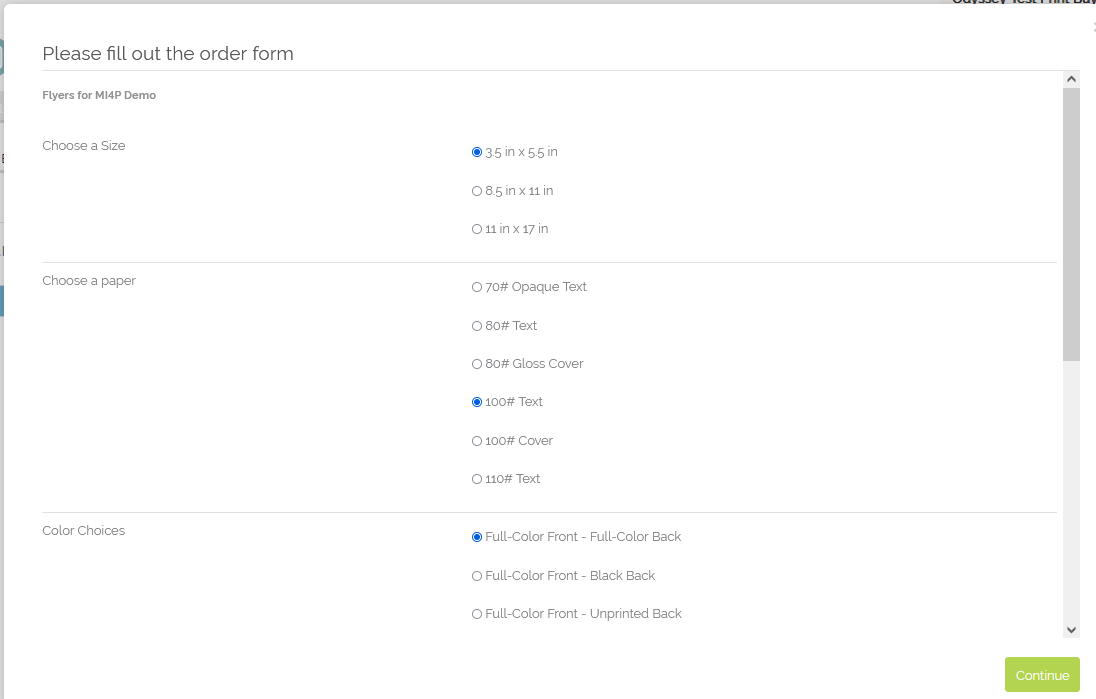
Example of filling out various specs from the order form pop-up modal
Step 3: Review/Edit Each Custom Product workflow
Reviewing and Editing the Estimate Workflow
Review Estimate Information
- Check the details displayed, including quantities, selling price, cost, and profit margin.
Review Workflow Path Information
- Verify the product details, such as paper type and dimensions.
Edit Workflow if Necessary
- Make needed changes to the estimate workflow such as adjusting a device if necessary.
- Add, remove, or edit processes as needed by using the respective icons next to each process name.
Review Paper Sizes
- If required, click the
 button to adjust the paper specifications.
-
Review/Edit
- Continue reviewing and editing the estimate workflow for each custom product
Decide on the Estimate
- Use the
 or
or  buttons to make a decision on behalf of the customer.
Print/Send the Estimate
- Click the
 button to print the estimate PDF or send it to the customer.
 - The 'Estimate ticket' screen is presented, allowing the printer to send the estimate to the customer via the
 button.
Step 4: Sending the Estimate to the Customer
Sending the Estimate to the Customer
Review Estimate Summary
- Verify the details displayed, including the estimate name, customer information, and different quantities.
Check Estimate Details
- Review the specifications and cost breakdown to confirm accuracy.
Send Estimate to Customer
- Click the
 button.
 - This will open the 'Estimates Summary' window where the printer can send the estimate to the customer via the
 button.
Print Estimate Ticket
- If needed, click the
 button to generate the estimate PDF of the estimate ticket.
Approve or Reject Estimate
- Use the
 button if the estimate needs to be rejected for any reason.
 - Click the
 button to approve the estimate on behalf of the customer.
Return to Previous Screen
- Click the
 button to go back to the previous estimate review screen if further edits or reviews are necessary.
Tips for Efficient Use
- Double-check all details for each custom product before sending the estimate to ensure there are no errors.
- Use the
 function to provide a hard copy or PDF version of the estimate for record-keeping or customer reference.