
Odyssey 2 includes a built-in scheduler for users to schedule jobs based on a number of factors, including printshop, employee and device 'Unavailability' rules, jobs already scheduled, or perhaps if the customer's job is needed before the estimated due date.
When viewing a workflow applied to a job, selecting the calendar icon will allow a user to view the availability hours of the printshop and if any other processes are scheduled for the previous, current, or next week.

Calendar icon at the Job workflow level
You may also view the different processes containing devices that are part of the job at the bottom of the schedule view.
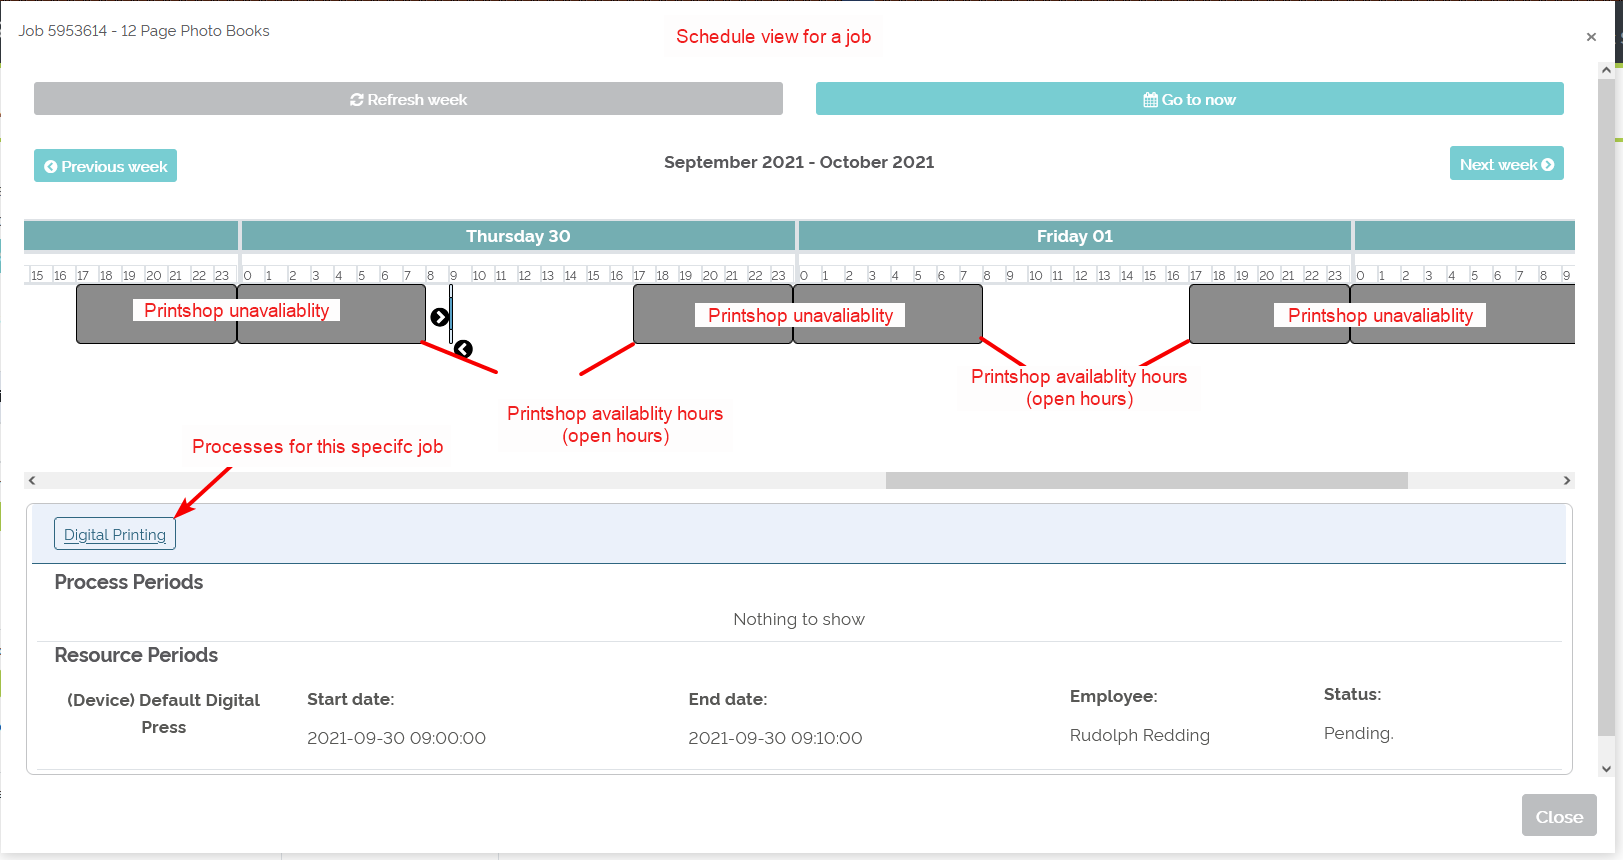
Schedule view of a job
To schedule the device of a process as part of a job workflow:
- Select the drop-down for a device
- Select 'Set Period'
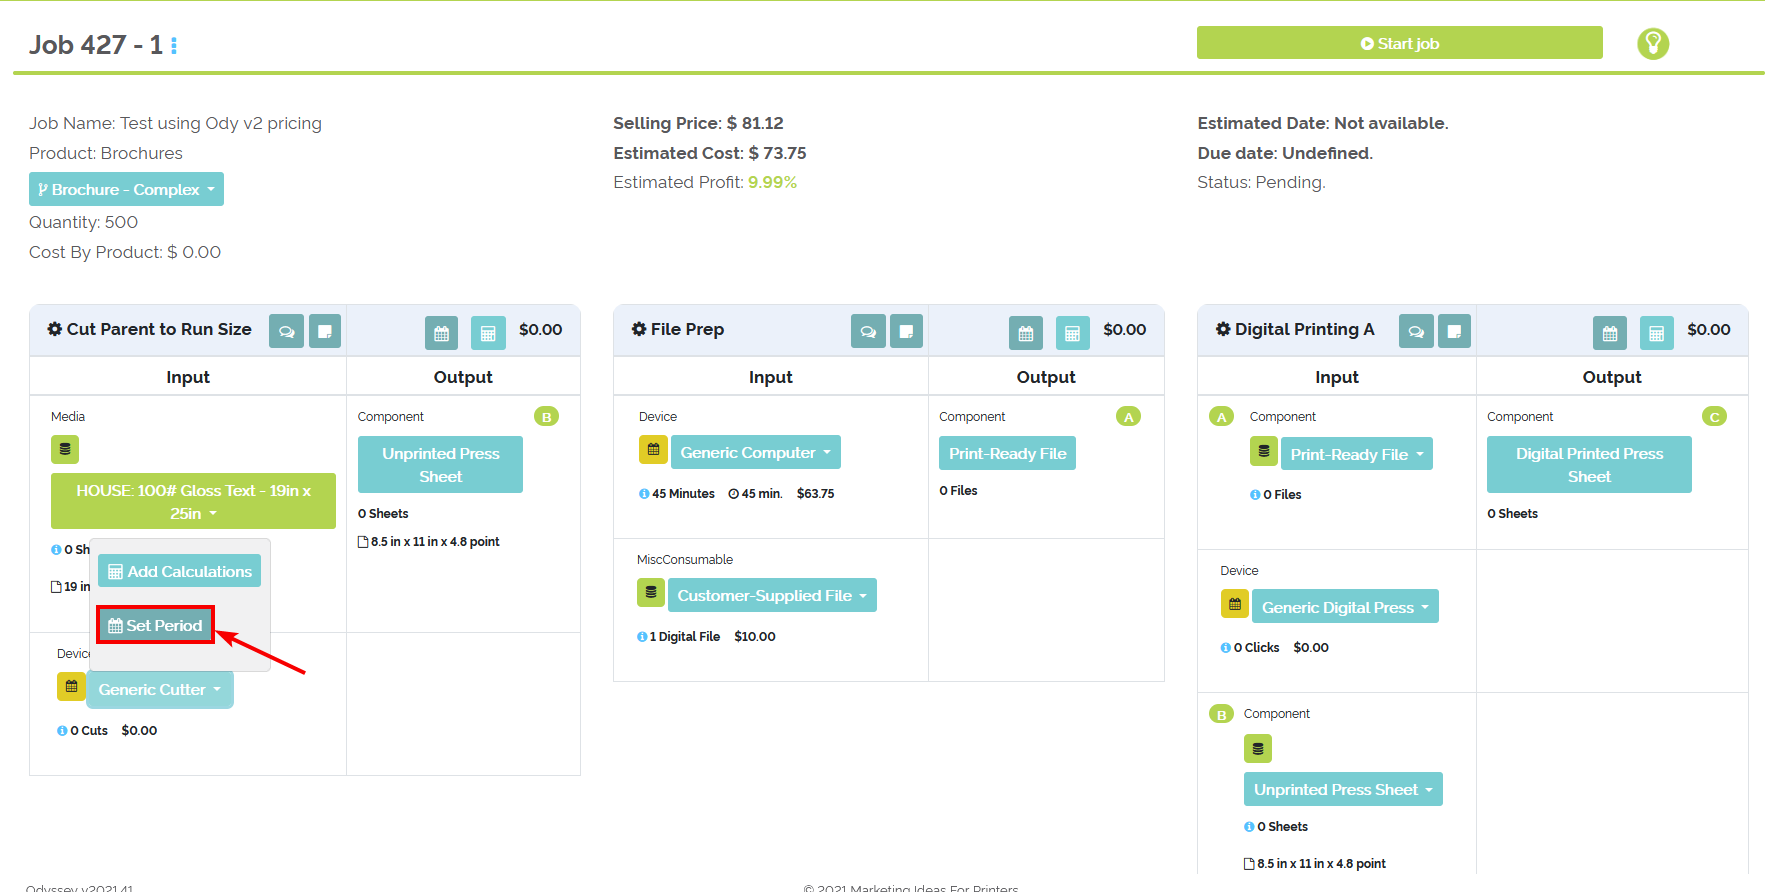
Select 'Set Period' to schedule a device within Odyssey''s calendar
- Users will see a pop-up window in which the device can be scheduled for starting and ending dates and times.
- Odyssey will automatically provide the next available dates and times based on the current availability.
- You may view available times by selecting 'Get Available Times' below the job name.
- Odyssey will then set the next available dates and times for the 'Start Date' and 'End Date'.
- You may select an employee to assign this process to as well as 'Schedule Reset Allowance'.
- The 'allowance' minutes are the number of minutes you provide as 'overage' or additional minutes you may allow before this process is considered not started.

- Select 'Save' once all the parameters for scheduling the device have been set/selected.
- Users will see the recently saved scheduled processes, both within the calendar view (left side of screen) and the section that shows unavailable and free time-frames.
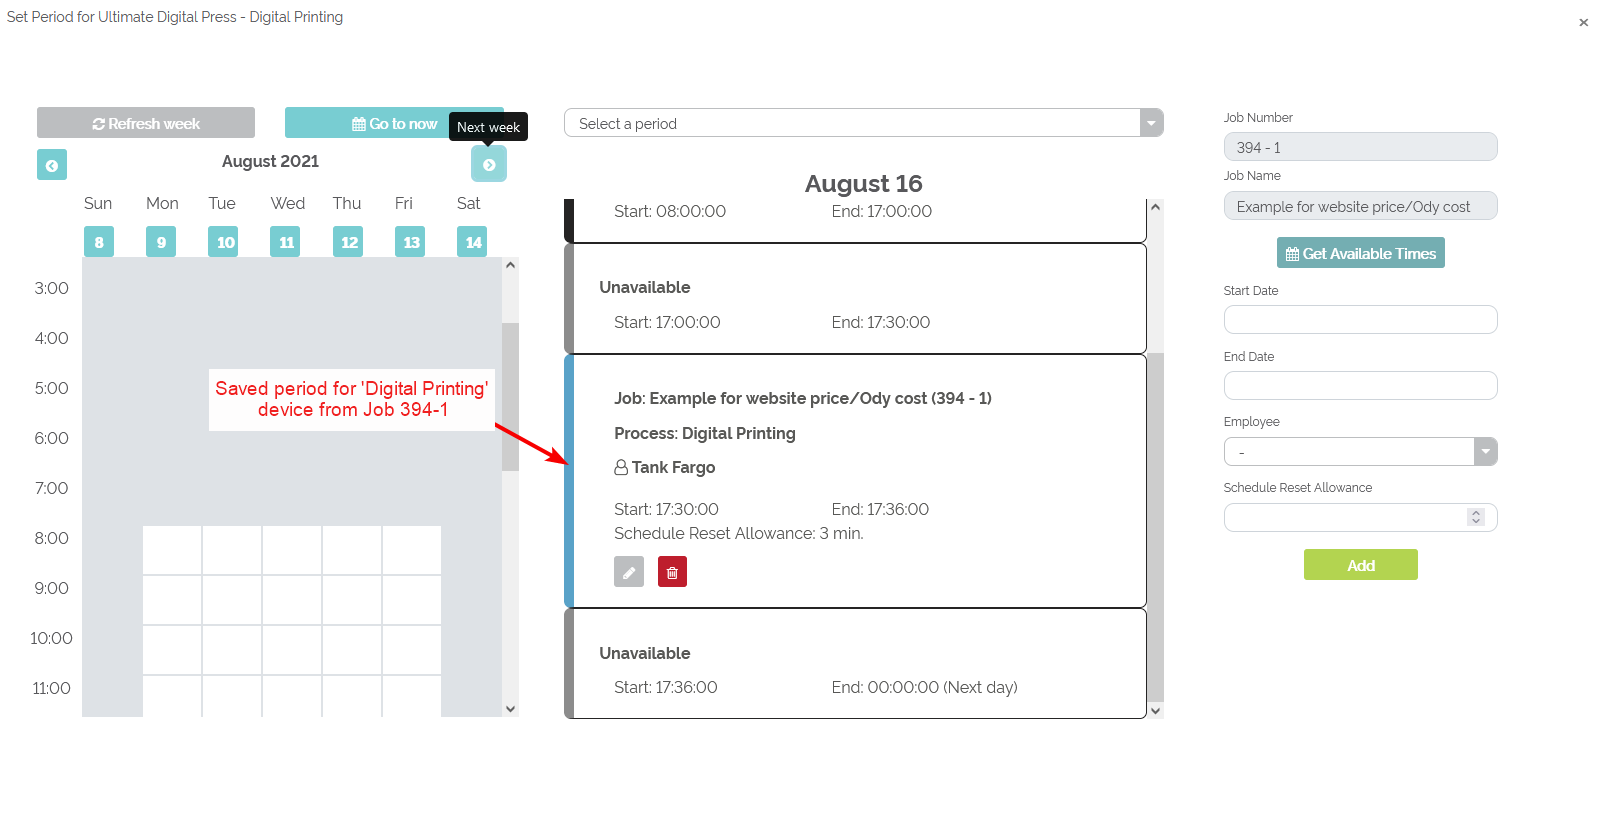
Users may edit the scheduled device by selecting the gray pencil icon within the scheduled process. Users may delete the scheduled device by selecting the red trash can within the scheduled process.
- Select 'Close' to navigate back to the main view of the job workflow.
- The calendar icon next to the device will now show as green; unscheduled devices show as yellow.
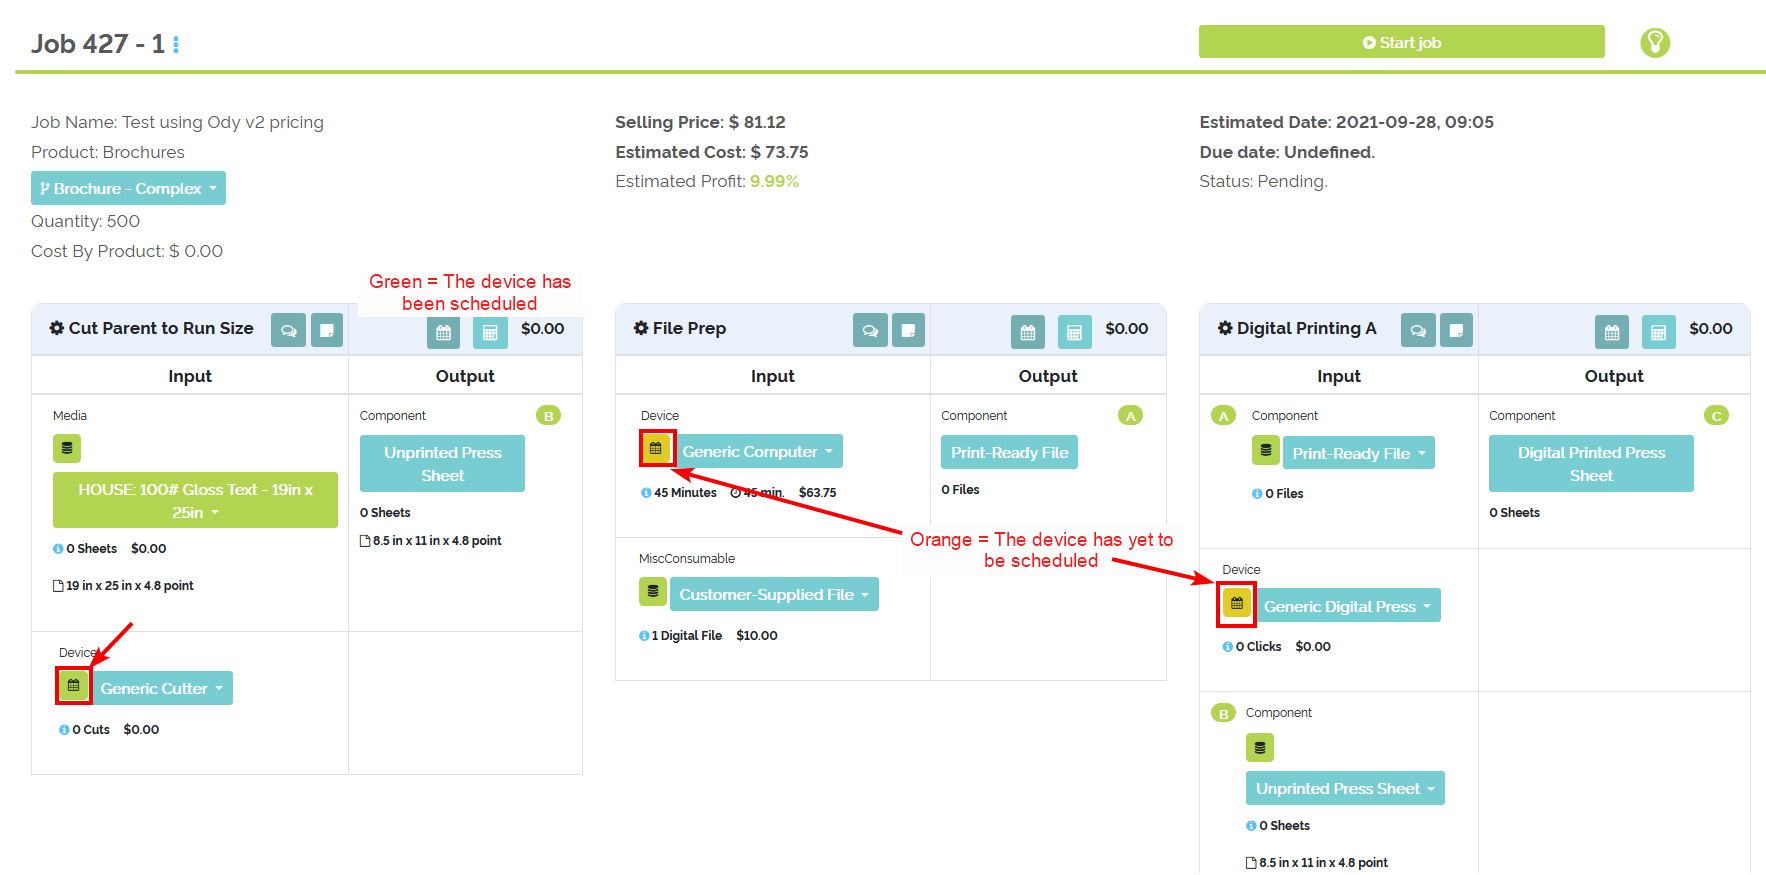
Scheduled devices shows as green; unscheduled devices show as yellow
- User may continue setting the period of other devices within processes for the job workflow to schedule them for future dates/times.
- Selecting the calendar icon for the job will now show the scheduled processes, along with the periods set for devices within the processes.
Refer to the below video for what the calendarized processes look like for a job.

Example calendar view of two scheduled devices as part of two processes for a job
Users may proceed to start the job even if not all the devices of a job haven't been scheduled for the job.
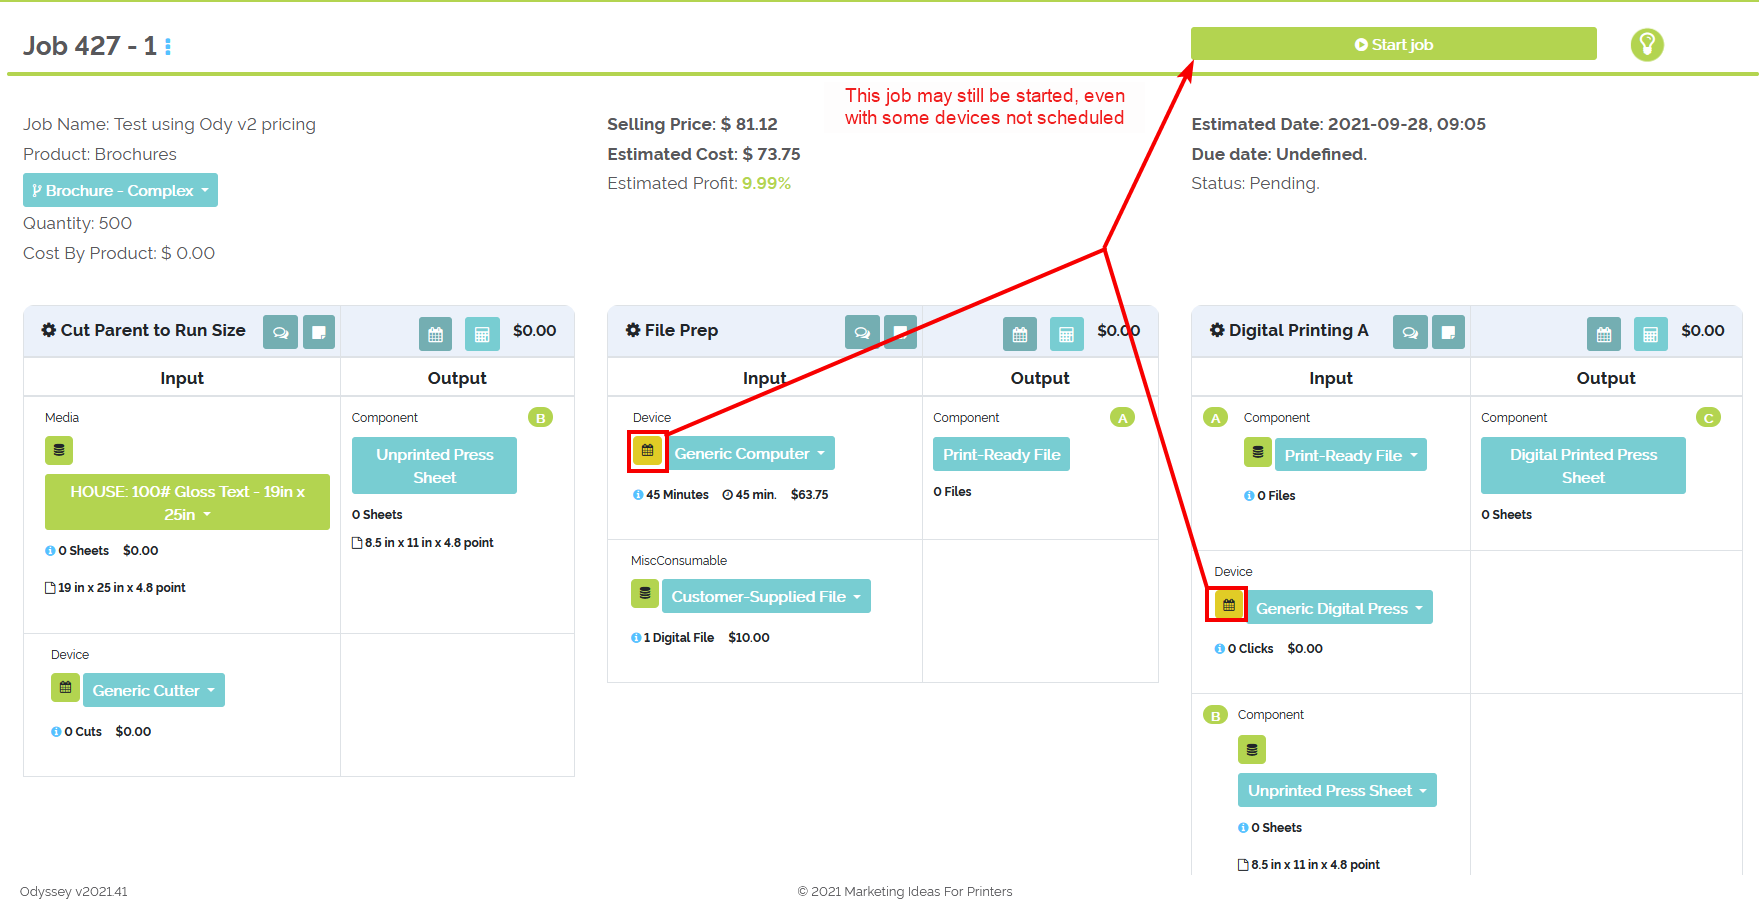
Jobs may be started even if not all devices have been scheduled